![]()
| (3196) 2010/03/02 |
Sharpness treatment must be done finally Sharpness treatment must be done finally, after every retouch has to be done. It is rigid rule within professional fields. On the contrary, if a photo, which was done of sharpness treatment, is treated with another retouch, then sharpness effectiveness will be reduced or defect of the sharpness will be emphasized. |
||||||||||||||||||||||||||||||||||||||||||||||||||||||||||||||||||||||||||||||||||||||||||||||||||||||||||||
| (2504) 2007/12/17 |
Table can be used like a title plate with emboss This type of style is used in this page to utilize a table to display title with emboss plate.
Color is not painted in the background of the table. If it is used as background color like the following left sample, that color is displayed in the flame also.
Giving flame pixel two, shadow size increases and emboss effect becomes bigger. |
||||||||||||||||||||||||||||||||||||||||||||||||||||||||||||||||||||||||||||||||||||||||||||||||||||||||||||
| (2499) 2007/12/12 |
Dual monitor support arm brings wider space When two monitors are set aside, support columns are considerably becomes
obstructive at the same time as supporting two screens. Support arm for
dual monitors was found to buy. Right..photograph shows center pillar and
two arms. The pillar is fixed on the back of the desk. Two arms go out
of the pillar right and left, and they fix the screens with four machine
screws behind the liquid crystal. Location of the screws is fixed as same
position with every manufacturer, and four screws to install appear at
these four fixed positions when stay in back of the liquid crystal back
is removed. It can be widely used on the desk actually. There is a space,
then keyboard, mouse and others can be used comfortably right under the
monitor, and it is a convenient goods to improve the space use efficiency. When two monitors are set aside, support columns are considerably becomes
obstructive at the same time as supporting two screens. Support arm for
dual monitors was found to buy. Right..photograph shows center pillar and
two arms. The pillar is fixed on the back of the desk. Two arms go out
of the pillar right and left, and they fix the screens with four machine
screws behind the liquid crystal. Location of the screws is fixed as same
position with every manufacturer, and four screws to install appear at
these four fixed positions when stay in back of the liquid crystal back
is removed. It can be widely used on the desk actually. There is a space,
then keyboard, mouse and others can be used comfortably right under the
monitor, and it is a convenient goods to improve the space use efficiency. |
||||||||||||||||||||||||||||||||||||||||||||||||||||||||||||||||||||||||||||||||||||||||||||||||||||||||||||
| (2497) 2007/12/10 |
CS3's Photomerge is innovative breakthrough Operational method and findings are same as before, but it turned into different software and became best one, maybe because of algorithm change. This travel of Las Vegas and Grand Canyon took and treated 62 panoramic pictures by the photomerge and only two images could not be processed. That two pictures included sky with clouds in many part and thin clear bar-like objectives such as bridge were located horizontally. It seems to be easy to synthesize from our eyes because clear objective continues. Clouds are not constant then that part may not be calculated. 60/62 could be done automatically and more complicated the lap part, easier to treat automatically. As for connected part, CS1 shows diagonal line showing forcibly connected result, but CS3's connected line could not be found even it would be enlarged. And when merging pictures of not lined up vertically, it connects only fitting part, then connecting part becomes step or uneven shape but connected part fits perfectly. And good panorama can be obtained by extracting the only fitted part. CS3 includes this type of backside revolution. It worth to buy the version up just by the Photomerge. |
||||||||||||||||||||||||||||||||||||||||||||||||||||||||||||||||||||||||||||||||||||||||||||||||||||||||||||
| (2496) 2007/12/09 |
(CS3) Operational screen for the dual monitors opens every palettes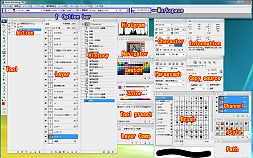
|
||||||||||||||||||||||||||||||||||||||||||||||||||||||||||||||||||||||||||||||||||||||||||||||||||||||||||||
| (2495) 2007/12/08 |
(CS3)Dual monitors bring ultimate efficiency for processing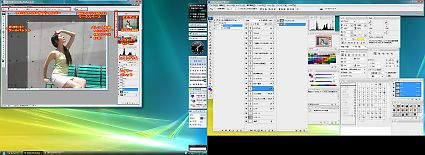 Photoshop can work very efficiently by using two monitors. The left half
of the right image is a screen for the image work, and a right half is
a screen for the operation. The work efficiency went up greatly using two
monitors by allotting the role respectively. Left monitors is 20 inches
(1600x1200), and the right is 22 inches wide monitor (1680x1050). Up to
now, 20 inches has been used. When the personal computer was newly bought
this time, 22-inch wide is attached together. The new PC was scheduled
to be composed only of the new 22-inch wide monitor at first for processing
the image, but it was not suitable for that objective . The current 20
inches is for the image processing screen, and 22-inch wide monitor is
for the operational screen because performance is not important for the
purpose. Therefore, it changed the composition of the new monitor as a
monitor for the operation screen. The operation of the window opening and
closing became unnecessary because every window opens always, the operational
windows will not hide a part of the images under processing when the work
screen was able to be used widely by using the monitor of work for the
operation properly, and either the windows for the operation are always
opened, and it helps to perform efficiently. Photoshop can work very efficiently by using two monitors. The left half
of the right image is a screen for the image work, and a right half is
a screen for the operation. The work efficiency went up greatly using two
monitors by allotting the role respectively. Left monitors is 20 inches
(1600x1200), and the right is 22 inches wide monitor (1680x1050). Up to
now, 20 inches has been used. When the personal computer was newly bought
this time, 22-inch wide is attached together. The new PC was scheduled
to be composed only of the new 22-inch wide monitor at first for processing
the image, but it was not suitable for that objective . The current 20
inches is for the image processing screen, and 22-inch wide monitor is
for the operational screen because performance is not important for the
purpose. Therefore, it changed the composition of the new monitor as a
monitor for the operation screen. The operation of the window opening and
closing became unnecessary because every window opens always, the operational
windows will not hide a part of the images under processing when the work
screen was able to be used widely by using the monitor of work for the
operation properly, and either the windows for the operation are always
opened, and it helps to perform efficiently. |
||||||||||||||||||||||||||||||||||||||||||||||||||||||||||||||||||||||||||||||||||||||||||||||||||||||||||||
| (2494) 2007/12/07 |
(CS3)Palette storage icon can store in small, and enlarge bigger when to use To open the whole palettes simultaneously, the double triangle of left direction is clicked. To store the palette into the storage area, to display the palette by clicking "window" then "action", to click the right direction triangle of upper right then to fined "Move to the palette storage area", to click this and to be inserted the last place of the storage area, that is, right end. Right and left place in the storage area can be selected by the right click. Default setting shows history, action, tool preset, bush, copy source, character, paragraph, layer comp. And it is better to be as it is. |
||||||||||||||||||||||||||||||||||||||||||||||||||||||||||||||||||||||||||||||||||||||||||||||||||||||||||||
| (2493) 2007/12/06 |
(CS3) Tool palette is the most frequently used |
||||||||||||||||||||||||||||||||||||||||||||||||||||||||||||||||||||||||||||||||||||||||||||||||||||||||||||
| (2492) 2007/12/05 |
(CS3) Photoshop CS3's screen layout is stayed as default setting because of easy operation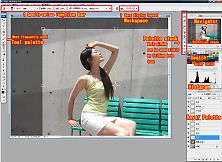 In the next stage, Photoshop opens and it shows the picture editing screen.
CS3 becomes easy to use such that tool palette changed to slim one line,
palette storage became icon style, etc., then default layout style is basically
used. In the next stage, Photoshop opens and it shows the picture editing screen.
CS3 becomes easy to use such that tool palette changed to slim one line,
palette storage became icon style, etc., then default layout style is basically
used.
|
||||||||||||||||||||||||||||||||||||||||||||||||||||||||||||||||||||||||||||||||||||||||||||||||||||||||||||
| (2491) 2007/12/04 |
(CS3) Adobe Bridge made linkage stronger with Photoshop or Illustrator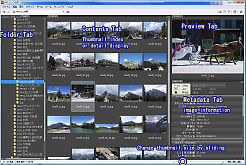 At first, Bridge as browser is started. Before the Bridge, Photoshop browser
used to be heavy, but Photoshop CS3 provided light and usable browser. At first, Bridge as browser is started. Before the Bridge, Photoshop browser
used to be heavy, but Photoshop CS3 provided light and usable browser.
|
||||||||||||||||||||||||||||||||||||||||||||||||||||||||||||||||||||||||||||||||||||||||||||||||||||||||||||
| (2278) 2007/04/23 |
268 Browser Firefox is considered so as not to become miserable display In the browser's world market share in January, 2007, Internet Explorer is 86%, and Firefox is 11%. It changed so as not to become too miserable when displayed with Firefox in the recent reputation of Firefox goodness though only IE had been basically made a target. 1. The automatic impression sending system with cgi is stopped. Because the size of the row has been changed greatly and it became very hard to see because displayed graphic size was different in Firefox. And the access number from the reader in this way is not so frequent. Then mailing system replaced it, then I do not think that it is actually in most inconvenience. 2. It changed from the way to which blue framing of surroundings was displayed only by IE into the method of using the table as framing. 3. Simultaneous display with a photo and "New" gig on top page is stopped. When the top page photograph will be made, the character of "New" was put in the photograph because the method of covering the photograph and on that with gif of NEW to display newly arrived information was displayed without being displayed coming in succession in Firefox, and queuing up. |
||||||||||||||||||||||||||||||||||||||||||||||||||||||||||||||||||||||||||||||||||||||||||||||||||||||||||||
| (2061) 2006/09/19 |
267 When a part of a table is copied and pasted, it makes possible if every
row is done at one time 2006/09/18
|
||||||||||||||||||||||||||||||||||||||||||||||||||||||||||||||||||||||||||||||||||||||||||||||||||||||||||||
| (1959) 2006/06/08 |
PC memory size increase from 512MB to 2GB improves Photoshop operation
speed dramatically Chance to edit digital photos by the Photoshop increases very much. After the memory size was increased, editing speed was improved dramatically and could feel the improvement because the disc access was hardly done even when 10 or more pictures of five million pixels or 2560x1920 at each scene were edited. The increase of the memory size is very effective for the improvement of operation speed of the Photoshop. |
||||||||||||||||||||||||||||||||||||||||||||||||||||||||||||||||||||||||||||||||||||||||||||||||||||||||||||
| (1877) 2006/03/17 |
266 Layout of edit display is to reserve wide operation area to switch
off the browser when working Next, the edit display of the image. The one to compose the screen of my experience. The browser is shut for the edit display that displays the image.
|
||||||||||||||||||||||||||||||||||||||||||||||||||||||||||||||||||||||||||||||||||||||||||||||||||||||||||||
| (1807) 2006/01/05 |
265 Automatic sending of impression, input method of the sender For the input method of the address of the sender, there are two ways 1, the mailer inputs or 2, putting a specific address as default 1. The mailer inputs its address <input type="text" name="_from"> Above-mentioned line is added. However, blank input line is inserted by this method. As for this line, it is difficult for the sender to understand this line without notification as, "Send your mail address in this input line." Then, this method is not adopted because it becomes complex. 2. A specific address is input as default. <input type="hidden" name="_from" value="kaz_1124@hotmail.co.jp"> In this method, it doesn't understand who the mailer is. Then a note of "Please add your mail address" is added in the same text. |
||||||||||||||||||||||||||||||||||||||||||||||||||||||||||||||||||||||||||||||||||||||||||||||||||||||||||||
| (1735) 2005/10/25 |
264 Photoshop Polygonal tool can make arbitrary polygon The path of arbitrary polygon can be made by "Polygonal tool". A polygonal number can be specified by putting the figure in "Number of sides". The pentagon can be dragged because it is in this example as "5". The corner can be taken in a polygonal option by one to specify "Radius" and "The corner is smooth". Moreover, star figure can also be obtained. |
||||||||||||||||||||||||||||||||||||||||||||||||||||||||||||||||||||||||||||||||||||||||||||||||||||||||||||
| (1734) 2005/10/24 |
263 Photoshop Oval tool can make oval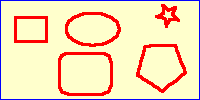 The oval also can be made by "Oval tool". The oval also can be made by "Oval tool".The option is set by "Oval tool option" of the option bar. "No restriction" is an oval option that major and minor axis are decided by the drug. "Real circle" is circle. An oval major and minor axis are specified by "Fixation". An oval size can be dragged by specifying "Slenderness ratio". |
||||||||||||||||||||||||||||||||||||||||||||||||||||||||||||||||||||||||||||||||||||||||||||||||||||||||||||
| (1733) 2005/10/23 |
262 Photoshop Round corner rectangular tool makes corner round. |
||||||||||||||||||||||||||||||||||||||||||||||||||||||||||||||||||||||||||||||||||||||||||||||||||||||||||||
| (1732) 2005/10/22 |
261 Photoshop Rectangular tool can make rectangle The rectangle can be made by "Rectangular selection tool" in the toolbox or "Rectangular tool" in the same box as "Line tool", without connecting four points by the path. "Rectangular option" appears when the triangle on a right edge of the option bar is clicked after "Rectangular tool" is selected. "No restriction" makes the rectangle. "Square" is a square. "Fixation" specifies the number of pixels on longitudinal and horizontal. "Slenderness ratio" can be specified. |
||||||||||||||||||||||||||||||||||||||||||||||||||||||||||||||||||||||||||||||||||||||||||||||||||||||||||||
| (1731) 2005/10/21 |
260 Photoshop Switch tool of the anchor point can yield round boundary  "Path" is a convenient concept. The origin uses the same path
for the red and blue lines. After a red line is drawn by "The borderline
of path", the red line is moved to passing and the position that doesn't
come in succession by "Movement tool". Even the real image of
red line moves, path remains because it only shows the route. "Path" is a convenient concept. The origin uses the same path
for the red and blue lines. After a red line is drawn by "The borderline
of path", the red line is moved to passing and the position that doesn't
come in succession by "Movement tool". Even the real image of
red line moves, path remains because it only shows the route.Next, in order to give roundness to point 1 and 2, "Switch tool of the anchor point" that exists in the same box as "Pen tool" of the toolbox is selected. When "Switch tool of the anchor point" is moved on the point 1 and 2, and it is dragged to right and left or up and down and then point a and 2 grows to be rounded. |
||||||||||||||||||||||||||||||||||||||||||||||||||||||||||||||||||||||||||||||||||||||||||||||||||||||||||||
| (1730) 2005/10/20 |
259 Photoshop Pen tool can make path and bring free figure.  The line and the figure are freely drawn by "Pen tool". A red
line to be connected with four points by "Pen tool", to make
"Path", and red line is drawn by "The borderline of right-clicking
--> Draw boundary line" under "Pen tool". The point that
should be noted at this time is drawn on the condition of "Pencil
tool" being not able to do the specification of the thickness etc.
of the line directly. Therefore, it is necessary to specify the thickness
and the color etc. of the line beforehand by "Pencil tool". The line and the figure are freely drawn by "Pen tool". A red
line to be connected with four points by "Pen tool", to make
"Path", and red line is drawn by "The borderline of right-clicking
--> Draw boundary line" under "Pen tool". The point that
should be noted at this time is drawn on the condition of "Pencil
tool" being not able to do the specification of the thickness etc.
of the line directly. Therefore, it is necessary to specify the thickness
and the color etc. of the line beforehand by "Pencil tool". |
||||||||||||||||||||||||||||||||||||||||||||||||||||||||||||||||||||||||||||||||||||||||||||||||||||||||||||
| (1729) 2005/10/19 |
259 Photoshop Draw a path by Pen-tool。 |
||||||||||||||||||||||||||||||||||||||||||||||||||||||||||||||||||||||||||||||||||||||||||||||||||||||||||||
| (1721) 2005/10/10 |
258 Photoshop "Web snap" is the ratio of Web colors The Web snap expresses the ratio of the Web use colors. 100 % means every color is Web color. However, the used color is limited and sometimes the color number decreases extremely according to circumstances. It makes to "0%" for the photograph. |
||||||||||||||||||||||||||||||||||||||||||||||||||||||||||||||||||||||||||||||||||||||||||||||||||||||||||||
| (1720) 2005/10/09 |
257 Photshop "Interlace" shows an image from rough picture to
exquisite gradually Interlace is a technique of the days of low transmission rate in the early Internet age. It comes out first a rough image, and gradually becomes exquisite. It is a technique not to feel the slow file reading speed. Interlace is hardly used today because transmission rate becomes faster and reading and showing style is for the image to be displayed from upper part to down gradually. |
||||||||||||||||||||||||||||||||||||||||||||||||||||||||||||||||||||||||||||||||||||||||||||||||||||||||||||
| (1719) 2005/10/08 |
256 Photoshop "Mat" can exclude the fringe of transparent part When the image is put on a transparent background, it is likely to have surroundings around the image. It is "Mat" to exclude the fringe. "White mat" excludes white fringe and the black one is cut off by "Black mat." Additionally, the excluded color can be specified too. |
||||||||||||||||||||||||||||||||||||||||||||||||||||||||||||||||||||||||||||||||||||||||||||||||||||||||||||
| (1718) 2005/10/07 |
255 Photshop "Transparent area" makes background clear When "Transparent areas" is clicked, the background becomes transparent. It is used when the background of the character is made transparent. There is a dither method also in this technique. The dither expresses the boundary condition of transparent areas and color part. It chooses from "no transparent dither", "Random transparent dither", "Noise transparent dither" and "Pattern transparent dither". It makes to "Random transparent dither" and "Rate= 100%" when there is a transparent area. |
||||||||||||||||||||||||||||||||||||||||||||||||||||||||||||||||||||||||||||||||||||||||||||||||||||||||||||
| (1717) 2005/10/06 |
254 Photoshop "Deterioration" makes file size small and rough
image quality
|
||||||||||||||||||||||||||||||||||||||||||||||||||||||||||||||||||||||||||||||||||||||||||||||||||||||||||||
| (1716) 2005/10/05 |
253 Photoshop "Dither" reduces number of color and makes smooth
expression from burr The gradation part especially becomes the burr like the image as in the left end picture because it decreases from tens of thousands of colors to just 256 colors. To reduce this burr, "Dither" method is adopted. Colors are diffused, and it pretends to smooth color change by few color numbers. The random dither is chosen, and the ratio of dither is adjusted to 100% usually.
|
||||||||||||||||||||||||||||||||||||||||||||||||||||||||||||||||||||||||||||||||||||||||||||||||||||||||||||
| (1715) 2005/10/04 |
252 Photoshop Reduction algorithm of number of colors from tens of thousands
of colors to 256 colors for gif GIF is selected. Tens of thousands of colors of jpg are reduced into 256 for gif. "Specific" is chosen for number of color reduction algorithm. "Specific" gives priority to "Web colors and close to human eyes". Others Perception: color is selected as close as to human eye perception feeling. Allocation: Colors, which are frequently used, used are mainly specified. Limitation (Web): Setting from 216 colors of Web use. Custom: Specified beforehand. Windows:256 windows standard colors are specified. However, it should be recognized as the color number decreases. |
||||||||||||||||||||||||||||||||||||||||||||||||||||||||||||||||||||||||||||||||||||||||||||||||||||||||||||
| (1714) 2005/10/03 |
251 Photoshop Save file for optimizing with Web (gif) The image can be saved with giv format to optimize for Web. The Web-save window appears by "file --> Save for Web." The commands are on upper part and the the color table is lower. When the default setting is intended, following commands are chosen such as "Specific", "Error diffusion method", "Dither =100%", "Transparent area is clicked", "Error diffusion method transparent dither", "Application =100%", "Deterioration = 0", "Mat --> blank" and "Interlace --> not selected." It returns back to the default setting when something wrong is assumed because it always maintains the setting change. |
||||||||||||||||||||||||||||||||||||||||||||||||||||||||||||||||||||||||||||||||||||||||||||||||||||||||||||
| (1708) 2005/09/27 |
250 Scrolling characters -6 Characters usually scroll in the square box. Current scroll is that both sides have rounded. As for the scroll character, this is result that in the center of the table scroll characters were put and round images were put in right and left of the table of triplex row one line. It is divided into three parts for better understanding but it can be integrated if it is changed "Width of line of the table --> 0 pixel" and "Blank in the cell --> 0 pixel." |
||||||||||||||||||||||||||||||||||||||||||||||||||||||||||||||||||||||||||||||||||||||||||||||||||||||||||||
| (1703) 2005/09/22 |
249 Hou to input specific characters for the translation site "itools" Translation site "itools" can provide from English to Spanish, French, German, Italian and Portuguese. And therefore, the input method of a special character such as German or French, etc. has good system. Just below the text input area, pull-down menu with characters of aeiou is set. When one of the pull-down menu is clicked, a specific character can be input. |
||||||||||||||||||||||||||||||||||||||||||||||||||||||||||||||||||||||||||||||||||||||||||||||||||||||||||||
| (1702) 2005/09/21 |
248 French specific characters input by writing html directly [á] [Á] [é] [É] [í] [Í] [ó] [Ó] [ú] [Ú] --> [á]. Change [a] just after [&] with one of [AeEiIoOuU] [à] [À] [è] [È] [ì] [Ì] [ò] [Ò] [ù] [Ù] --> [à]. Specific character is shown on a browser. [â] [Â] [ê] [Ê] [î] [Î] [ô] [Ô] [û] [Û] --> [â]. [ä] [Ä] [ë] [Ë] [ï] [Ï] [ö] [Ö] [ü] [Ü[ --> [ä]. [ç] [Ç] --> [ç]. |
||||||||||||||||||||||||||||||||||||||||||||||||||||||||||||||||||||||||||||||||||||||||||||||||||||||||||||
| (1701) 2005/09/20 |
247 French specific character input by changing to French keyboard How to change to French keyboard ; Control panel --> Local and language option --> Local option --> Customize --> French. Keyboard can be changed to French. Canada French keyboard will be chosen because Canadian people of English speaking used this type of keyboard and easier to use for English keyboard user. Keyboard change can be done by [Shift+Alt] [è] --> [:], [ç] --> [[],[à] --> []], [é] --> [/], [È] --> [*], [Ç] --> [{], [À] --> [}[, [É] --> [?], [â] --> [@→a], [ê] --> [@→e], [î] --> [@→i], [ô] --> [@→o], [û] --> [@→u], [Â] --> [@→shift+a], [Ê] --> [@→shift+e], [Î] --> [@→shift+i], [Ô] --> [@→shift+o], [Û] --> [@→shift+u] |
||||||||||||||||||||||||||||||||||||||||||||||||||||||||||||||||||||||||||||||||||||||||||||||||||||||||||||
| (1700) 2005/09/19 |
246 German to English free translator I had some experiences that it was difficult to understand because of the language of the country like German or French like sightseeing information etc. For instance, explanation of a building such as churches is only German. The explanation is taken with the digital camera, and it is translated into English on a free translation site. It can be understood easily in case of little information because sentences are translated. It is useful and convenient. It corresponds to 6 languages on this translation site "itools" including English, Spanish, French, German, Italian and Portuguese. |
||||||||||||||||||||||||||||||||||||||||||||||||||||||||||||||||||||||||||||||||||||||||||||||||||||||||||||
| (1699) 2005/09/18 |
245 German specific character input method by writing in html source Specific characters can not be saved as they are directly written by editor such as Home page builder. The German specific characters are directly written in the html source. [ä] --> [ä], [Ä] --> [Ä], [ö] --> [ö], [Ö] --> [Ö], [ü] --> [ü], [Ü] --> [Ü], [ß] --> [ß] |
||||||||||||||||||||||||||||||||||||||||||||||||||||||||||||||||||||||||||||||||||||||||||||||||||||||||||||
| (1698) 2005/09/17 |
244 German specific character input by changing to German keyboard How to change to German keyboard ; Control panel --> Local and language option --> Local option --> Customize --> German. Keyboard can be changed to German. German specific character keyboard layout (Right keyboard can be input as left German specific character.) [ä] --> [:], [Ä] --> [Shift+:], [ö] --> [;], [Ö] --> [Shift+;] --> [ü] --> [@], [Ü] --> [Shift+@], [ß] --> [-] Keyboard layout change can be done by [Shift+Alt] |
||||||||||||||||||||||||||||||||||||||||||||||||||||||||||||||||||||||||||||||||||||||||||||||||||||||||||||
| (1669) 2005/08/18 | 243 Photoshop Correct the inclination by the measure tool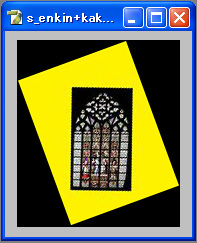  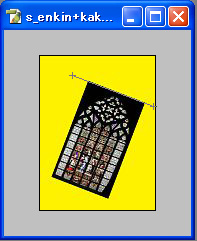 
|
||||||||||||||||||||||||||||||||||||||||||||||||||||||||||||||||||||||||||||||||||||||||||||||||||||||||||||
| (1665) 2005/08/14 | 242 Photoshop Paint out at once by paont out tool 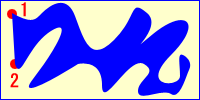 
|
||||||||||||||||||||||||||||||||||||||||||||||||||||||||||||||||||||||||||||||||||||||||||||||||||||||||||||
| (1663) 2005/08/12 | 241 Photoshop By using PhotoShop image analysis, all layers can be converted
into the same reduction rate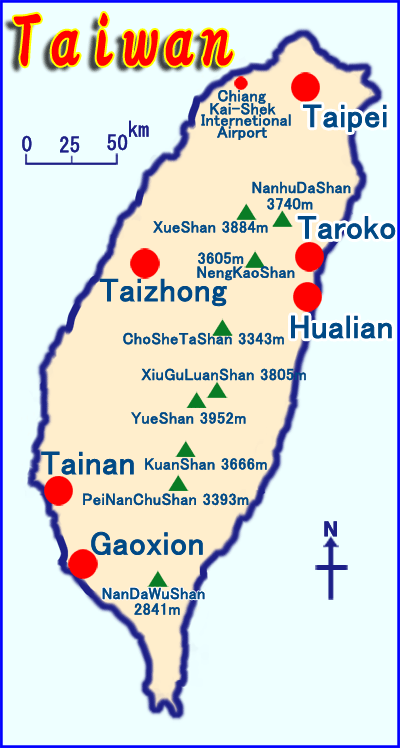 When the reduction of this PhotoShop is used, not only the image but also
all layers are reduced. When the reduction of this PhotoShop is used, not only the image but also
all layers are reduced.For instance, a original image is a size of 400x748 pixel in the map of Taiwan. To make it plainly, this image is reduced the size into 1/2. The size of the canvas becomes half, of course, 200x374. The character layer named Taiwan is being written in this map by 48 points. When this is made half a size, the same character is converted into the layer of 24 points. The character of the city in Taipei etc. is being similarly written by 14 points. This is converted into half the character layer of seven points. The size of the image is adjusted to 1/3, and the number of points of characters is converted halfway with 32.16 points etc. though this example was plainly done by 1/2. Only in case of the image reduction, there is no problem to use image size reduction software properly in this case, but only PhotoShop can be done because all layers are proportionally reduced when reducing by the image analysis of PhotoShop. |
||||||||||||||||||||||||||||||||||||||||||||||||||||||||||||||||||||||||||||||||||||||||||||||||||||||||||||
| (1662) 2005/08/11 | 240 Photoshop Quick mask mode can easily edit the selection area It is easy to    edit the range of the selection later by a quick face mask mode. The selected
area is roughly decided first with the automatic choice tool etc. Next,
a quick mask of the toolbox is chosen. It is painted outside the selection
red. The area of the selection paints and edits with white and black. It
is painted in red because outside the selection range there when the black
is painted. If the range of the selection is increased, white is painted.
The range of the selection appears in the dotted line when returning it
to the drawing edit mode. After that, such as color change is edited. An
easy edit becomes possible because it can do even if the range of the selection
is not definitely decided from the beginning. edit the range of the selection later by a quick face mask mode. The selected
area is roughly decided first with the automatic choice tool etc. Next,
a quick mask of the toolbox is chosen. It is painted outside the selection
red. The area of the selection paints and edits with white and black. It
is painted in red because outside the selection range there when the black
is painted. If the range of the selection is increased, white is painted.
The range of the selection appears in the dotted line when returning it
to the drawing edit mode. After that, such as color change is edited. An
easy edit becomes possible because it can do even if the range of the selection
is not definitely decided from the beginning. |
||||||||||||||||||||||||||||||||||||||||||||||||||||||||||||||||||||||||||||||||||||||||||||||||||||||||||||
| (1661) 2005/08/10 | 239 PhotoShop : Command parameter is changed by modal control Because the action stops temporarily when the modal control is used, the
input value can be specified by the dialog box. It is shown in a black
square in the third line from the top in this example. Because it stops
temporarily when becoming the action of "Unsharpmask" if a black
square is checked and "Dialog box of Unsharpmask" appears, it
keeps setting the parameter, OK being pushed, and the action being executed.
The action to which the modal control is set is displayed by a red square
icon. A convenient command such as being going to change only sharpness. Because the action stops temporarily when the modal control is used, the
input value can be specified by the dialog box. It is shown in a black
square in the third line from the top in this example. Because it stops
temporarily when becoming the action of "Unsharpmask" if a black
square is checked and "Dialog box of Unsharpmask" appears, it
keeps setting the parameter, OK being pushed, and the action being executed.
The action to which the modal control is set is displayed by a red square
icon. A convenient command such as being going to change only sharpness. |
||||||||||||||||||||||||||||||||||||||||||||||||||||||||||||||||||||||||||||||||||||||||||||||||||||||||||||
| (1658) 2005/08/07 | 238 PhotoShop : Patch tool can easily erase big clear obstacle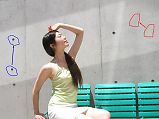  There is another tool indispensable for the restoration. It is the patch
tool in the toolbox. If the restoration brush is displayed, it replaces
to the patch tool because it is in the same place as the restoration brush.
The usage is easy. The patch tool is selected in the toolbox. The part
that wants to be erased like red circle is enclosed. Not accurate shape
is enough. Drug it to the target place where no black spot is. Information
of before-arrow transmitted to arrow-ahead. Blue mark shows opposite way.
Black spot information is copied to the place of used-to-be nothing. There is another tool indispensable for the restoration. It is the patch
tool in the toolbox. If the restoration brush is displayed, it replaces
to the patch tool because it is in the same place as the restoration brush.
The usage is easy. The patch tool is selected in the toolbox. The part
that wants to be erased like red circle is enclosed. Not accurate shape
is enough. Drug it to the target place where no black spot is. Information
of before-arrow transmitted to arrow-ahead. Blue mark shows opposite way.
Black spot information is copied to the place of used-to-be nothing. |
||||||||||||||||||||||||||||||||||||||||||||||||||||||||||||||||||||||||||||||||||||||||||||||||||||||||||||
| (1657) 2005/08/06 | 237 PhotoShop : Make a new set for action presetting Action presetting is set by default of 14 items. Up to now, I have not used them yet, although some of those commands treat complex actions. What made for myself comes fitting still for me. A special folder is made clicking "A new set is made" under the action palette at this time. Action presetting made for myself are put in this folder. |
||||||||||||||||||||||||||||||||||||||||||||||||||||||||||||||||||||||||||||||||||||||||||||||||||||||||||||
| (1656) 2005/08/05 | 236 PhotoShop : Parameter change of action presetting The reproducing command is selected. A simple action such that "The line of one pixel is drawn internally in the borderline" is selected for example. It is three pixels or to draw five pixels though the width of this line is one pixel. In order to change parameters such as one pixel line, and, in this case, it expands to the commands line with the place where "Width: 1" is seen. Because the window of the parameter comes out when double-clicking it on the position of the command, that is, "Width: 1" etc. , it changes to "Width: 3" etc. Important thing for this time is parameter itself. Because the content of this parameter has changed, title name should be changed in the title of the name of the action, or the parameter should be returned back after use. Otherwise, it becomes the disagreement between the title and the content. |
||||||||||||||||||||||||||||||||||||||||||||||||||||||||||||||||||||||||||||||||||||||||||||||||||||||||||||
| (1655) 2005/08/04 | 235 PhotoShop : List of palette storage area is action presetting, history
and character in use frequency order They are "Action presetting", "History", and "Character. " to put in the palette storage area and to use frequently. It arranges from the left in order of the use frequency. Because the advantage of the palette storage area can set the size larger when the palette expands as it doesn't worry to take up the place. For example, the names of action presetting can be improved to have long name to present content and long history palette can be seen the list at once that can be trace back ahead by reserving long list. |
||||||||||||||||||||||||||||||||||||||||||||||||||||||||||||||||||||||||||||||||||||||||||||||||||||||||||||
| (1654) 2005/08/03 | 234 PhotoShop : Merit to store action presetting in the palette storage
area The action palette that is the table of action presetting is put in the palette storage area in the upper part of the screen to take up the space now. When a title of an action presetting is named after representing all the action sequences such as "Shadow & highlight +30 --> Unsharpmask 100 --> chroma +20," then all the action sequences can be understood at once. Even such a long name can be stored in the storage area without worrying taking up space. |
||||||||||||||||||||||||||||||||||||||||||||||||||||||||||||||||||||||||||||||||||||||||||||||||||||||||||||
| (1653) 2005/08/02 | 233 PhotoShop : Confirming brightness distribution by "histogram"
|
||||||||||||||||||||||||||||||||||||||||||||||||||||||||||||||||||||||||||||||||||||||||||||||||||||||||||||
| (1651) 2005/07/31 | 232 PhotoShop : "Layer palette" displays layers and large area
is desirable |
||||||||||||||||||||||||||||||||||||||||||||||||||||||||||||||||||||||||||||||||||||||||||||||||||||||||||||
| (1650) 2005/07/30 | 231 PhotShop : "Swatch" as color table Color change is also frequently working action. Swatch is displayed usually
because of frequency though there are Swatch and a style in the color palette. Color change is also frequently working action. Swatch is displayed usually
because of frequency though there are Swatch and a style in the color palette.It is convenient to put not only the color that is beforehand but also the color set for myself. For instance, because an extremely light color is used for the background etc. These colors are separately defined, given a name for myself, and put in the palette. |
||||||||||||||||||||||||||||||||||||||||||||||||||||||||||||||||||||||||||||||||||||||||||||||||||||||||||||
| (1649) 2005/07/29 |  230 PhotoShop : Convenient "Histogram" palette when brightness
is adjusted 230 PhotoShop : Convenient "Histogram" palette when brightness
is adjusted"Histogram" navigator palette is in a box same as navigator palette and useful when the brightness of the image is adjusted. When brightness is adjusted, "Histogram" is necessary though it works while confirming the position by "Navigator palette" when partially correcting it while doing the scaling. It switches from "Navigation" at this time. "Histogram" is the distribution diagram of brightness and going to the left side by dark when going to the right axe bright. A very effective tool to see, while drawing the image, how it is distributed from a dark point to bright. |
||||||||||||||||||||||||||||||||||||||||||||||||||||||||||||||||||||||||||||||||||||||||||||||||||||||||||||
| (1648) 2005/07/28 | 229 PhotoShop : "Navigator" is convenient to know the position
when the screen expands When correcting small parts, the screen is expanded fast. Then, a present
expansion screen might not understand where the position is as a whole.
"Navigator" palette is convenient at this time to confirm. A
red square is displayed in the entire image and this is the current displayed
size of the image. A red frame moves when the mouse pointer is taken on
a red frame and it drags. When largely expanding, it is useful when the
position is decided by the navigator. The scale of enlargement and the
reduction ratio change freely if this is dragged right and left though
there is a triangular sign under the navigator palette. When correcting small parts, the screen is expanded fast. Then, a present
expansion screen might not understand where the position is as a whole.
"Navigator" palette is convenient at this time to confirm. A
red square is displayed in the entire image and this is the current displayed
size of the image. A red frame moves when the mouse pointer is taken on
a red frame and it drags. When largely expanding, it is useful when the
position is decided by the navigator. The scale of enlargement and the
reduction ratio change freely if this is dragged right and left though
there is a triangular sign under the navigator palette. |
||||||||||||||||||||||||||||||||||||||||||||||||||||||||||||||||||||||||||||||||||||||||||||||||||||||||||||
| (1647) 2005/07/27 | 228 PhotoShop : Toolbox," most frequently used Toolbox is a most often used window. The language "Toolbox" of
the image that the carpenter's tool and "palette" is not used
when the picture is drawn. This carpenter's tool often certainly used.
This toolbox is laid down but actually is put vertically because it takes
up space. Browser's vertical scroll-bar is put this sensitive location
for preventing being hidden when the browser is displayed. Toolbox is a most often used window. The language "Toolbox" of
the image that the carpenter's tool and "palette" is not used
when the picture is drawn. This carpenter's tool often certainly used.
This toolbox is laid down but actually is put vertically because it takes
up space. Browser's vertical scroll-bar is put this sensitive location
for preventing being hidden when the browser is displayed. |
||||||||||||||||||||||||||||||||||||||||||||||||||||||||||||||||||||||||||||||||||||||||||||||||||||||||||||
| (1646) 2005/07/26 | 227 PhotoShop : "Palette storage area" stores various palettes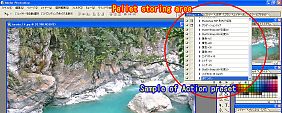 Palettes which are frequently used but when always displaying, it takes
up space therefore those palettes are stored in this storage. There are
original expression in PhotoShop, and "Palette" is the one. The
palette is understood as window. Palettes which are frequently used but when always displaying, it takes
up space therefore those palettes are stored in this storage. There are
original expression in PhotoShop, and "Palette" is the one. The
palette is understood as window.For instance, it is the action presetting. Lightens or darkens, and such synchronizing action is combined as presetting to be able to execute decided operation. It is convenient though always displaying needs place in the screen as a palette (= window). Besides this, the history and the character palette, etc. can be stored, and when using it, can execute a necessary item by the pull-down as shown in a right picture. |
||||||||||||||||||||||||||||||||||||||||||||||||||||||||||||||||||||||||||||||||||||||||||||||||||||||||||||
| (1645) 2005/07/25 | 226 PhotoShop : "Option bar" can specify various parameters |
||||||||||||||||||||||||||||||||||||||||||||||||||||||||||||||||||||||||||||||||||||||||||||||||||||||||||||
| (1644) 2005/07/24 | 225 PhotoShop : Layout of edit display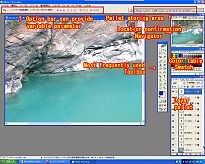 Next, the edit display of the image. The one to compose the screen of my
experience. The browser is shut for the edit display that displays the
image. Next, the edit display of the image. The one to compose the screen of my
experience. The browser is shut for the edit display that displays the
image.
|
||||||||||||||||||||||||||||||||||||||||||||||||||||||||||||||||||||||||||||||||||||||||||||||||||||||||||||
| (1643) 2005/07/23 | 224 PhotoShop : Displays the browser and facilitates retrieval of edited
file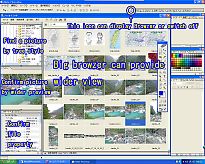 Confirming the image that tries to be edited while making the list display
done by the browser and working become efficient. The display by the browser
can be used from PhotoShop 7. The screen layout is currently used style. Confirming the image that tries to be edited while making the list display
done by the browser and working become efficient. The display by the browser
can be used from PhotoShop 7. The screen layout is currently used style.
|
||||||||||||||||||||||||||||||||||||||||||||||||||||||||||||||||||||||||||||||||||||||||||||||||||||||||||||
| (1567) 2005/05/08 | 223 PhotoShop : Accent aigu in French "ÉéÓó"
is written as "é" When html source is written as "é" WWW browser displays as "e accent aigu" or "é". "É" means capital letter É. When first letter is changed one of EeOo, Ó or ó can be displayed. By this expression name of BÉLA BARTÓK was input in Brussels. |
||||||||||||||||||||||||||||||||||||||||||||||||||||||||||||||||||||||||||||||||||||||||||||||||||||||||||||
| (1558) 2005/04/29 | 222 PhotoShop : Actual commands under action pre-set current usage
|
||||||||||||||||||||||||||||||||||||||||||||||||||||||||||||||||||||||||||||||||||||||||||||||||||||||||||||
| (1548) 2005/04/16 | Picture is clipped as specified size of pixel
 Like the place specified first is not clipped but everything is newly copied,
the window is moved, and the technique for doing like clipping to the specified
pixel. Like the place specified first is not clipped but everything is newly copied,
the window is moved, and the technique for doing like clipping to the specified
pixel.
|
||||||||||||||||||||||||||||||||||||||||||||||||||||||||||||||||||||||||||||||||||||||||||||||||||||||||||||
| (1545) 2005/04/05 | 221 PhotShop : Clipping specified pixel of picture It is not to clip the specified area first, but whole picture is newly
copied and the window is moved. It is the technique for doing like clipping
to the specified pixel. It is not to clip the specified area first, but whole picture is newly
copied and the window is moved. It is the technique for doing like clipping
to the specified pixel.
|
||||||||||||||||||||||||||||||||||||||||||||||||||||||||||||||||||||||||||||||||||||||||||||||||||||||||||||
| (1534) 2005/04/05 | 220 PhotoShop : To make background transparent, background should be converted
into layer Sometimes, the shadow on the background is made on the transparency background using gif style. The layer of the photograph must be colored even if the shadow is made by doubleclick and "shadow" command. Because the property of the layer remains as "Background," then this background layer must be colored. Therefore, "Background" should be converted into the layer, if the background can be treated as transparency using gif format. In order to convert it, "Background" layer is clicked, and it converts by "Layer --> New --> From background to layer." Because the layer with the property of "Background" is lost when doing so, the shadow can be put on the background of the transparency. |
||||||||||||||||||||||||||||||||||||||||||||||||||||||||||||||||||||||||||||||||||||||||||||||||||||||||||||
| (1484) 2005/02/15 | 219 PhotoShop : After clipped size is set same as the original image by
the clipping tool To maintain the same slenderness ratio as the original photo even after the clipping, "Background" of the option bar is clicked. The numerical value of the original image enters automatically for "Width", "Height" and "Resolution." "Width" and "Height" are only unit of lengths such as cm. It is not possible to specify by pixel. PhotoShop started from the printing usage, then it is used to print the photo of Xcm x Ycm with Z pixel/inch resolution. It is said that usage of pixel is after the digital camera age. When using the background, it is only same slenderness ratio as the original image that can be dragged, and the final fixed size becomes same pixel of the original image. |
||||||||||||||||||||||||||||||||||||||||||||||||||||||||||||||||||||||||||||||||||||||||||||||||||||||||||||
| (1483) 2005/02/14 | 218 PhotoShop : Frame size is freely arranged by the clipping tool
1.The clipping tool of the toolbox is selected. 2.The mouse is dragged from the upper left to the lower right near the part that wants to trim. Because the size can be changed later, first clipping can be dragged freely. 3.The outside of the clipped area is displayed dark. Eight points are shown on the edge of the clipped area that change the size of the frame, the position is dragged to clip and it is accurately decided. The clipping frame can be freely moved by fixing the size of the trimmed frame when the inside part of the clipped area is dragged. 4.It double-clicks in the clipped frame or when "Enter" is pushed, the clipping is completed. 5.Because the size of the frame can be freely set, this method is easier though similar work can be done with cutting and the paste. 6.For the default setting, there are no figures in the clipping tool in "Width", "Height" and "Resolution" of the option bar in the upper part of the screen. It is clipped to the drugged size in this condition. Please make it to the blank by "Clear" if there is a figure. |
||||||||||||||||||||||||||||||||||||||||||||||||||||||||||||||||||||||||||||||||||||||||||||||||||||||||||||
| (1460) 2005/01/22 | 217 Pull down menu without null line The pull-down menu is one of the formats of "Form." When selecting by the questionnaire etc. , the form is used. However, the pull-down menu is convenient to choose the next jump destination from a lot of alternatives as used on this top page because it can save space on the web. Form style uses <FORM> in front and </FROM> at the end. But an empty line can be produced after the line. Without using <FORM> and </FORM> and writes starting from "<SELECT..." directly. The following null line disappears by this way. Select Gallery and push Go! The layout seems to be good, and it works without any problems now then this style will be used for a while though it might be grammatically violating in reality. |
||||||||||||||||||||||||||||||||||||||||||||||||||||||||||||||||||||||||||||||||||||||||||||||||||||||||||||
| (1369) 2004/10/22 | 216 Pictures in a table are arranged right and left
To prevent this, a table, with one row and three lines, is inserted. A right image is put in the right cell of the inserted table, then it never changes line and is displayed just as one line. |
||||||||||||||||||||||||||||||||||||||||||||||||||||||||||||||||||||||||||||||||||||||||||||||||||||||||||||
| (1347) 2004/9/30 |
215 Set background color first, then change part of cell colors, to reduce
file volume As of the background of a table, in case of almost same color in the almost cells and a part of cells in different colors, then 1st whole table color is decided by [Click the table --> edit --> property change --> table --> background --> color] following to click the cells, which colors are changed by [edit --> property change --> cell --> background --> color.] This method can avoid repetition of color description and save file volume. |
||||||||||||||||||||||||||||||||||||||||||||||||||||||||||||||||||||||||||||||||||||||||||||||||||||||||||||
| (1346) 2004/9/29 |
214 Try to use fit focus filter in the Blurred Photo Rescue
Fit focus filter, added from version 2, is easy to operate and useful function. |
||||||||||||||||||||||||||||||||||||||||||||||||||||||||||||||||||||||||||||||||||||||||||||||||||||||||||||
| (1345) 2004/9/28 |
213 PhotoShop : Comparison between PhotoShop's unsharpness-mask and Blurred
Photo Rescue 2004/09/28
On the other hand, Blurred Photo Rescue has tremendous effect for this matter. Fit focus filter was added in the version 2 edition. It can improve even in the default condition. In the same fit focus filter, there is different role and it can adjust the designated area. Current focus aid filter is a little bit complicated to set but when filter condition is appropriately adjusted, it works even for the big blurred photo. |
||||||||||||||||||||||||||||||||||||||||||||||||||||||||||||||||||||||||||||||||||||||||||||||||||||||||||||
| (1344) 2004/9/27 |
212 PhotoShop : Black points disappeared by restore brush without trace
|
||||||||||||||||||||||||||||||||||||||||||||||||||||||||||||||||||||||||||||||||||||||||||||||||||||||||||||
| (1311) 2004/8/23 |
211 How to use NeatImage 1. Click [Open Input Image] 2. Set noise analyzing area. Click [Device Noise Profile] --> Define the area by mouse drag. 3. Noise is roughly analyzed by [Rough Noise Analyzer] to click blue pencil. 4. Whole picture is analyzed by [Auto fine-tune] 5. Finish noise analysis by [Auto complete] 6. Execute noise elimination by clicking [Output image --> Apply] 7. Save refult. [Save output image --> input file name --> Apply] |
||||||||||||||||||||||||||||||||||||||||||||||||||||||||||||||||||||||||||||||||||||||||||||||||||||||||||||
| (1310) 2004/8/23 |
210 How to use Blurred Photo Rescue 1. Open photo file. [file(O) --> open(O)] 2. Focussing. Blur width is set by [Image(I) --> Focus aid filter(F) --> Blur width(pixcel)] 3. [Execution --> Decision] 4. Save refult. [Save with file name --> Execution --> save --> OK] |
||||||||||||||||||||||||||||||||||||||||||||||||||||||||||||||||||||||||||||||||||||||||||||||||||||||||||||
| (1299) 2004/8/12 |
209 PhotoShop CS Bstt : Panorama Photomerge and Shadow & Highlight Panorama synthesizer Photomerge and Shadow & Highlight can make best natural panorama photo automatically far better than manual tear-provoking efforts. Had a hard time to connect and fit combination edge. Tried many times. Also shortly shrinked aspect ratio. Another thing, when left photo is set flat then the other photo becomes right up slope. Photomerge can resolve both. When shadow part is tried to be brighter, light part becomes too bright. This is solved by Shadow & Highlight. Light part is as it is and shadow area becomes clear. Both Photomerge and Shadow & Highlight are best piece in PhotoShop CS. |
||||||||||||||||||||||||||||||||||||||||||||||||||||||||||||||||||||||||||||||||||||||||||||||||||||||||||||
| (1298) 2004/8/11 |
208 Some points of photographing for panoramic pictures
|
||||||||||||||||||||||||||||||||||||||||||||||||||||||||||||||||||||||||||||||||||||||||||||||||||||||||||||
| (1297) 2004/8/10 |
207 PhotoShop : Photomerge can provide "natural" panoramic photos
Normal panorama synthesize software treat connection parts blurry only. Comparing with them, even before PhotoShop 7.0, by using rotation and enlarge/shrink it makes the connection part so natural that it is difficult to find the connected part. But even only this connection is hard job. The result has big front face and unnatural. 一方PhotoShop CSで追加になったBy using Photomerge, right and left synthesized photo is naturally enlarged. Left under photo was a result of Photomerge with three pictures automatically. Background is colored yellow to know the deformation. Just cutting out the photo makes natural panoramic photo. |
||||||||||||||||||||||||||||||||||||||||||||||||||||||||||||||||||||||||||||||||||||||||||||||||||||||||||||
| (1296) 2004/8/09 |
206 PhotShop : Automatic synthesize of panorama photo by Photomerge
Photomerge is started by [file -> automatic processing -> Photomerge]. Source files are read by the Photomerge dialogue box. Click "reference" and read files by the order of panoramic synthesize from left to right one by one. After reading, Photomerge dialogue box will be opened. If automatic synthesize could not be processed then by picking the photos with palm tool, location will be roughly set. Click "rules of perspective" in the setting and "perspective correction" and "sophisticated synthesize" in the composition setting. Perspective correction enlarge or rotate left and right photo automatically. This is all about the setting. When pushing OK button, upper three photos automatically synthesized into the panoramic photo. Because it differs from normal panorama soft and enlarge ends of the panoramic photo then it becomes natural. |
||||||||||||||||||||||||||||||||||||||||||||||||||||||||||||||||||||||||||||||||||||||||||||||||||||||||||||
| (1295) 2004/8/08 |
205 PhotoShop Applying character layer pallet with warp text Warp text can be set as layer pallet like character layer. Warp text can be set as layer pallet like character layer.Right title is used flag style curve deformation and by using this layer pallet, drop shadow, boundary line or gradation and etc. can be applied. |
||||||||||||||||||||||||||||||||||||||||||||||||||||||||||||||||||||||||||||||||||||||||||||||||||||||||||||
| (1294) 2004/8/07 | 204 PhotShop Deformation of characters by using Warp Text
Character layer is made by character tool. Editing of warp text can be made later. When selecting character layer and character tool, a button on tool option bar of upper widow is shown and it is shown as "Warp text making." This tool can set three elements of curve, horizontal deformation and vertical deformation. On pushing "warp text making" button, "warp text dialogue" is shown and input these three elements. |
||||||||||||||||||||||||||||||||||||||||||||||||||||||||||||||||||||||||||||||||||||||||||||||||||||||||||||
| (1293) 2004/8/06 | 203 Banner of 88x31 can not be shown by my Windows XP
In fact, another site wrote it as banner but picture could not be shown. I wondered why. This banner size is also 88x31 pixel. Another thing not to be understood. Same pictures are shown on the upper table but right picture is not shown by the Windows XP which I use. However, my another PC of Windows 2000 can be shown. My Windows XP has something strange. |
||||||||||||||||||||||||||||||||||||||||||||||||||||||||||||||||||||||||||||||||||||||||||||||||||||||||||||
| (1279) 2004/7/23 | 202 If no character in cell, no line display --> Display by adding same
color character
|
||||||||||||||||||||||||||||||||||||||||||||||||||||||||||||||||||||||||||||||||||||||||||||||||||||||||||||
| (1278) 2004/7/22 | 201 Add variation for table line with color
|
||||||||||||||||||||||||||||||||||||||||||||||||||||||||||||||||||||||||||||||||||||||||||||||||||||||||||||
| (1277) 2004/7/21 | 200 No designation of wraparound with picture such as left or justification
Right three pictures are stored in a same table. Two pictures are designated as left or right justification by [edit --> property change] and wraparound is set left or right justification. Background of the pictures were set as red to be visible. If the wraparound is not designated, then it is OK even when background color is set. But if wraparound is set, space between background and the picture is shown, and background color appears. It happened by chance and I tried to stop it but it took long time to know the reason. |
||||||||||||||||||||||||||||||||||||||||||||||||||||||||||||||||||||||||||||||||||||||||||||||||||||||||||||
| (1276) 2004/7/20 | 199 PhotoShop Shrink picture size - comparison of file size by compression
rate
Central four pictures were reduced by PhotoShop. Looking at scale down pictures, differences are small between low compression rate and high. PhotoShop CS may improved the compression algorithm. When comparing Reduce soft of 232KB with high compression, there is not so much difference between them. Both PhotoShop and Reduce soft can be used according to occasion. |
||||||||||||||||||||||||||||||||||||||||||||||||||||||||||||||||||||||||||||||||||||||||||||||||||||||||||||
| (1275) 2004/7/19 | 198 PhotoShop Shrink picture size
Click the right pictures and link to original scale of 2272x1704 and scale down size of both PhotoShop and Shrink software with same 45%. Comparing file size with same save reduction condition of 80% (low reduction rate,) file size of PhotoShop is 537KB, and Shrink soft becomes 232KB. Picture quality of Shrink software is a little clearer than PhotoShop. But if the file seize is not focused, then PhotoShop is acceptable. Three photos above are size of 204x153. They were scale down from original picture of 2272x1704.。 |
||||||||||||||||||||||||||||||||||||||||||||||||||||||||||||||||||||||||||||||||||||||||||||||||||||||||||||
| (1266) 2004/7/10 | 197 (1)NeatImage eliminates noise (2)Brighten by shadow & highlight (3)Blurred photo rescue
Analog photo usually has tremendous noise and therefore it causes shaggy feeling. NeatImage is easy to operate. It has automatic operation then I suggest to use this automatic operation. I used it for some photos and all photos could be filtered by automatic operation. (2)Next step is PhotoShop. Left picture was made by cut and paste for the new file from the scanned picture. By applying shadow and highlight, it can be retouched automatically by just one click. Right picture was applied to shadow and highlight and green color of wood changed from black to green. (3)Sharpening picture by Blurred photo rescue. Blurred photo rescue is a Japanese language software but very useful. When picture is going to be sharpened, it becomes clear but on the contrary, noise level increases. Left photo was retouched by the software and it became clear without increasing noise. Right photo was applied by un-sharp mask of the PhotoShop. Amount (A) was set as a large number of 245 but the photo of Blurred photo rescue is much better and clear. |
||||||||||||||||||||||||||||||||||||||||||||||||||||||||||||||||||||||||||||||||||||||||||||||||||||||||||||
| (1265) 2004/7/9 | 196 NeatImage can eliminate noise from digital picture
Left photo is the original scanned picture and when looking at the sky , tremendous noise can be seen. I found a very useful software called NeatImage. It is a share ware. Right photo was processed by the NeatImage and noise was removed. Especially when looking at the sky, the difference is clear. It is quite useful software. NeatImage demo version can be downloaded as free ware and there are some restrictions compared with production version but it is valuable to try and I recommend it. |
||||||||||||||||||||||||||||||||||||||||||||||||||||||||||||||||||||||||||||||||||||||||||||||||||||||||||||
| (1248) 2004/6/22 | 195 Even quite blurred photo can be sharpened by Blurred Photo Rescue of Japanese software
|
||||||||||||||||||||||||||||||||||||||||||||||||||||||||||||||||||||||||||||||||||||||||||||||||||||||||||||
| (1244) 2004/6/18 | 194 Display without space on top It is difficult to explain then different two pages are shown on purpose, such as top page and profile. Difference on both pages are with or without space on top of those pages. It is described as top margin amount in html. Fist description starts as <BODY background="parts/back_gray_2.gif"> --> with space on top <BODY background="parts/back_gray_2.gif" topMargin="0"> --> without space on top By adding this red description, space is diminished as zero and it is displayed without space. There are same kind of expression such as leftMargin="0" --> left margin is zero, MARGINWIDTH="0" --> margin width is zero, MARGINHEIGHT="0" --> margin height is zero. |
||||||||||||||||||||||||||||||||||||||||||||||||||||||||||||||||||||||||||||||||||||||||||||||||||||||||||||
| (1219) 2004/5/24 | 193 PhotoShop CS's main feature "Shadow and Highlight" can easily compensate exposure
(1)Left : Disastrous dark original picture (2)Middle : Image -> color tone compensation -> shadow and highlight (3)Right : Image -> color tone compensation -> tone curve They are all easy one button treatment. This is truly useful. |
||||||||||||||||||||||||||||||||||||||||||||||||||||||||||||||||||||||||||||||||||||||||||||||||||||||||||||
| (1218) 2004/5/23 | 192 PhotoShop CS ; One push modification by Shadow and Highlight
Shadow and Highlight made Chiang Kaishek brighter and can be identified. This is main feature of PhotoShop CS. This best photo in the four was made by just one push of Shadow and Highlight. |
||||||||||||||||||||||||||||||||||||||||||||||||||||||||||||||||||||||||||||||||||||||||||||||||||||||||||||
| (1173) 2004/4/11 | 191 PhotoShop Advanced browser function PhotoShop CS Browser function was strengthened very much. However other software has this kind of function generally and it caught up at last. PhotoShop files or any other image files such as jpg can be shown by the PhotoShop all at once. This is quite useful. PhotoShop 7.0 could handle it but speed becomes very fast and necessary function was all added then usage was brought a marked improvement. |
||||||||||||||||||||||||||||||||||||||||||||||||||||||||||||||||||||||||||||||||||||||||||||||||||||||||||||
| (1172) 2004/4/10 | 190 PhotoShop "Shadow and Highlight" can automatically compensate
exposure, new PhotoShop CS feature
|
||||||||||||||||||||||||||||||||||||||||||||||||||||||||||||||||||||||||||||||||||||||||||||||||||||||||||||
| (1154) 2004/3/23 | 189 PhotoShop Layer link Right samples are made in Japanese and contents are same as English. That
is to say blue characters mean How to use it. Such layers as character
have vector information and in order to remove the vector information and
to make it just a picture, those layers are rasterized. By this change,
[layer -> combination with layer below] or [Ctrl+E] key make one combined
layer and deformation can be done integrated. Right samples are made in Japanese and contents are same as English. That
is to say blue characters mean How to use it. Such layers as character
have vector information and in order to remove the vector information and
to make it just a picture, those layers are rasterized. By this change,
[layer -> combination with layer below] or [Ctrl+E] key make one combined
layer and deformation can be done integrated. When layers with different layer effect are combined, layer effect will
be changed also and boundary color changes. Right sample has two layers
of PhotoShop and How to use it (in Japanese). After rasterizing two layers
respectively, [combination with layer below] were done and this changed
the color of PhotoShop added blue boundary line same as How to use it. When layers with different layer effect are combined, layer effect will
be changed also and boundary color changes. Right sample has two layers
of PhotoShop and How to use it (in Japanese). After rasterizing two layers
respectively, [combination with layer below] were done and this changed
the color of PhotoShop added blue boundary line same as How to use it.When combination will be done with keeping layer effect respectively, [layer link] is used. By linking,  Base layer is selected in layer pallet. Chosen layer is shown as stylus
symbol. And a layer to be linked is chosen and just left part of the layer
will be clicked. That place shows link icon of chain symbol. Link action
finished then by [edit -> deformation] can change to any shape. To release
the link, in the layer pallet, the link icon will be clicked. Base layer is selected in layer pallet. Chosen layer is shown as stylus
symbol. And a layer to be linked is chosen and just left part of the layer
will be clicked. That place shows link icon of chain symbol. Link action
finished then by [edit -> deformation] can change to any shape. To release
the link, in the layer pallet, the link icon will be clicked.But this link style limits deformation condition. Same as character layer with vector information, [enlarge and shrink, rotation, distortion] can be activated but [free deform, perspective] can not be used. Layer link can move all together, copy, paste, alignment, combination or deformation. It is really useful. |
||||||||||||||||||||||||||||||||||||||||||||||||||||||||||||||||||||||||||||||||||||||||||||||||||||||||||||
| (1153) 2004/3/22 | 188 PhotoShop Imaging layer characters -> rasterize Character layer is expressed as vector style not to have character un-smooth
boundary. It is like a true font in Windows. This page's title has two
parts of PhotoShop and How to use it! and they consist of two layers. Each
layer style is different such as red or blue boundary line. To make shadow,
duplicated layer is changed to tint color. Tried to change new layer but
character layer has vector then deformation styles are limited. And layer
to deform is right clicked to choose [rasterize layer]. Rasterize removes
vector information from character layer and makes it just a picture. By
rasterizing, every deformation can be done such as [edit -> deformation
-> free deform]. Shade of this title is reversed upside-down and drag
to under right direction. Character layer is expressed as vector style not to have character un-smooth
boundary. It is like a true font in Windows. This page's title has two
parts of PhotoShop and How to use it! and they consist of two layers. Each
layer style is different such as red or blue boundary line. To make shadow,
duplicated layer is changed to tint color. Tried to change new layer but
character layer has vector then deformation styles are limited. And layer
to deform is right clicked to choose [rasterize layer]. Rasterize removes
vector information from character layer and makes it just a picture. By
rasterizing, every deformation can be done such as [edit -> deformation
-> free deform]. Shade of this title is reversed upside-down and drag
to under right direction. |
||||||||||||||||||||||||||||||||||||||||||||||||||||||||||||||||||||||||||||||||||||||||||||||||||||||||||||
| 2004/03/14 | PhotoShop Samples of [filter -> light effect] |
||||||||||||||||||||||||||||||||||||||||||||||||||||||||||||||||||||||||||||||||||||||||||||||||||||||||||||
| (1144) 2004/3/13 | 187 PhotoShop Fill up by gradation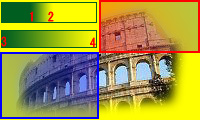
|
||||||||||||||||||||||||||||||||||||||||||||||||||||||||||||||||||||||||||||||||||||||||||||||||||||||||||||
| (1143) 2004/3/12 | 186 PhotoShop Filling tool can paint all the area at once
|
||||||||||||||||||||||||||||||||||||||||||||||||||||||||||||||||||||||||||||||||||||||||||||||||||||||||||||
| (1142) 2004/3/11 | 185 PhotoShop Cut out a figure Editing such as blurring is sometimes necessary to cut out a figure and there are some ways.
|
||||||||||||||||||||||||||||||||||||||||||||||||||||||||||||||||||||||||||||||||||||||||||||||||||||||||||||
| (1126) 2004/2/24 | 184 PhotoShop History brush
Art history brush uses artistic filters when restoring. But those filters make the original photo into unexpected chaos and the person has artistic sense, it may be used but normal person is difficult to use or useless. |
||||||||||||||||||||||||||||||||||||||||||||||||||||||||||||||||||||||||||||||||||||||||||||||||||||||||||||
| (1125) 2004/2/23 | 183 PhotoShop Gray scale of black and white  It is easy to change to monotone by [image -> mode -> gray scale].
However it should be noted that all layers will be changed into monochrome. It is easy to change to monotone by [image -> mode -> gray scale].
However it should be noted that all layers will be changed into monochrome.Or by [image -> color tone adjustment -> channel mixer], when click the layer by monochrome, only that layer can be changed into black and white. By copying as [layer duplication] original picture remains. |
||||||||||||||||||||||||||||||||||||||||||||||||||||||||||||||||||||||||||||||||||||||||||||||||||||||||||||
| (1122) 2004/2/20 | 182 PhotoShop Extract figure from background
|
||||||||||||||||||||||||||||||||||||||||||||||||||||||||||||||||||||||||||||||||||||||||||||||||||||||||||||
| (1121) 2004/2/19 | 181 PhotoShop Background eraser tool Center of brush distinguishes color and erase the color inside the area
of the brush. Figure edge can be kept and only background can be deleted.
This sample is constructed by two layers. Lower layer is painted blue.
Top layer has red figure with yellow background. By using background eraser,
erase the area close to red figure and within circle area of the eraser,
brush detects yellow color in center of the circle. It erase the color
close to yellow in the eraser circle. Red figure is not erased because
it is not a yellow matter. By erasing this, red figure pops up clearly
with blue back. Center of brush distinguishes color and erase the color inside the area
of the brush. Figure edge can be kept and only background can be deleted.
This sample is constructed by two layers. Lower layer is painted blue.
Top layer has red figure with yellow background. By using background eraser,
erase the area close to red figure and within circle area of the eraser,
brush detects yellow color in center of the circle. It erase the color
close to yellow in the eraser circle. Red figure is not erased because
it is not a yellow matter. By erasing this, red figure pops up clearly
with blue back. |
||||||||||||||||||||||||||||||||||||||||||||||||||||||||||||||||||||||||||||||||||||||||||||||||||||||||||||
| (1120) 2004/2/18 | 180 PhotoShop Magic eraser tool Choose [magic eraser tool] in the tool box. Without rubbing like a rubber
eraser, this can delete automatically every nearest pixel by one click
within the area. By this sample, not using background eraser, but using
magic eraser yellow part is deleted automatically and yellow background
changes blue back. Default [adjacency] delete next pixel to the click pixel.
Without this selection, every nearest color will be deleted from the picture
all at once. [Whole layer] deletes from all layers. Upper option bar's
tolerance means degree of closeness of the color. Value is set from 0 to
255. Default setting is 32. Lower tolerance value deletes only close colors
to the clicked one. On the contrary, large value deletes wide range of
the color pixel. Choose [magic eraser tool] in the tool box. Without rubbing like a rubber
eraser, this can delete automatically every nearest pixel by one click
within the area. By this sample, not using background eraser, but using
magic eraser yellow part is deleted automatically and yellow background
changes blue back. Default [adjacency] delete next pixel to the click pixel.
Without this selection, every nearest color will be deleted from the picture
all at once. [Whole layer] deletes from all layers. Upper option bar's
tolerance means degree of closeness of the color. Value is set from 0 to
255. Default setting is 32. Lower tolerance value deletes only close colors
to the clicked one. On the contrary, large value deletes wide range of
the color pixel. |
||||||||||||||||||||||||||||||||||||||||||||||||||||||||||||||||||||||||||||||||||||||||||||||||||||||||||||
| (1119) 2004/2/17 | 179 PhotoShop Delete fringe pixel from selected area When move or paste will be done with an area of unti-alias, it may happen that pixel around the border will be included in the selected area and it makes fringe around the border. [Mat command] can delete fringe around the border. After move or paste, fringe is substituted with colors close to the border by [layer -> matting -> fringe deletion]. For example, if yellow figure is selected with blue back, blue fringe will be moved with the figure. By the action of fringe deletion, blue color is substituted by the yellow. Substituted width is assigned by pixel unit. One or two pixel is enough. Black mat deletion or White mat deletion is used for black and white background then we do not have a chance usually. |
||||||||||||||||||||||||||||||||||||||||||||||||||||||||||||||||||||||||||||||||||||||||||||||||||||||||||||
| (1118) 2004/2/16 | 178 PhotoShop Draw arrow Window pops up for the arrow and click [end point]. This adds an arrow in the direction of drag. One of the things is [start point] that makes the arrow with the drag starting point. Width, length and dimple ratio will be set by %. Arrow width and length are ratio to the line width. Dimple ration is the one how arrow root has cut into the line. This sample shows 4 dots line width, arrow width 300%, length, 500% and dimple ratio, 20%. |
||||||||||||||||||||||||||||||||||||||||||||||||||||||||||||||||||||||||||||||||||||||||||||||||||||||||||||
| (1115) 2004/2/13 | 177 PhotoShop Draw smooth figure by pen tool -2
|
||||||||||||||||||||||||||||||||||||||||||||||||||||||||||||||||||||||||||||||||||||||||||||||||||||||||||||
| (1114) 2004/2/12 | 176 PhotoShop Draw smooth figure by pen tool
|
||||||||||||||||||||||||||||||||||||||||||||||||||||||||||||||||||||||||||||||||||||||||||||||||||||||||||||
| (1113) 2004/2/11 | 175 PhotoShop Shade direction for the character is just "one direction"
for every layer When putting characters into a photo, drop shadow will be added for sometime and there may happen to be desired for different layers as different effect. Character size can be changed in the same layer but shade direction must be set in only one direction even in the same kind of layer as well as different type of layers if they are layers of one PhotoShop file. |
||||||||||||||||||||||||||||||||||||||||||||||||||||||||||||||||||||||||||||||||||||||||||||||||||||||||||||
| (1112) 2003/2/10 | 174 PhotoShop Color will be inserted into color sample pallet New color will be made by [setting drawing color] in the tool box. When mouse is put on a vacant place in the color sample pallet, then pencil changes into bucket and display that [by click new color sample making] then new name will be input. Original color and names are useful to edit photos because colors are limited to the editor. To delete colors from the color sample pallet, that color sample is drag-and-dropped to the garbage can just below. |
||||||||||||||||||||||||||||||||||||||||||||||||||||||||||||||||||||||||||||||||||||||||||||||||||||||||||||
| (1018) 2003/11/5 | 173 Infoseek provides "news, weather and fortune teller" ticker Japanese search engine Infoseek provides scrolling ticker script of free charge which can be shown from one of three, news weather and fortune teller. Adding to the script, using site must register to infoseek to limit the web. When click the news for example, detail news will be shown linked to the infoseek news page. One infoseek ID can put 10 tickers on the web. |
||||||||||||||||||||||||||||||||||||||||||||||||||||||||||||||||||||||||||||||||||||||||||||||||||||||||||||
| (997) 2003/10/15 | 172 PhotoShop Brightness and contrast adjustment
Rightest photo seems to be not natural. I adopted this photo as +20/+15. |
||||||||||||||||||||||||||||||||||||||||||||||||||||||||||||||||||||||||||||||||||||||||||||||||||||||||||||
| (996) 2003/10/14 | 171 PhotoShop Touching up blue suffering by tone curve
By [image -> color tone adjustment -> color balance], same adjustment is possible to pull the knob to yellow direction. This photo was taken at almost sunset time before having dinner. Brightness was not sufficient and right photo seems to be brightened but actually it was just added yellow by tone curve. |
||||||||||||||||||||||||||||||||||||||||||||||||||||||||||||||||||||||||||||||||||||||||||||||||||||||||||||
| (988) 2003/10/4 | 170 Original tool bar of HomePage Builder When we continuously use the HomePage Builder, some specified commands are often used than the others. Then customized tool bar is effective. I use this customized K7s Bar and no original tool bars. |
||||||||||||||||||||||||||||||||||||||||||||||||||||||||||||||||||||||||||||||||||||||||||||||||||||||||||||
| (982) 2003/9/30 | 169 After making HotMedia animation, stop and restart by right click After making HotMedia animation, it can be stopped and restart when mouse cursor is put on the animation and then right click stops it and one more right click starts again. Right click, stop, restart, repetition is possible. |
||||||||||||||||||||||||||||||||||||||||||||||||||||||||||||||||||||||||||||||||||||||||||||||||||||||||||||
| (963) 2003/9/11 | 168 Arrange vertical location
Right photos are set center in vertical position as default and the center long photo causes vertical location to put space between characters and the left picture to be looked loose. Right photo itself is same as left but [upper alignment] made no space and gave it tense atmosphere. |
||||||||||||||||||||||||||||||||||||||||||||||||||||||||||||||||||||||||||||||||||||||||||||||||||||||||||||
| (962) 2003/9/10 | 167 [border=0] should be added when frame is prepared for a picture with
link
Right sample shows same two dot frame and left side does not have [border="0"] then after linkage russet color is added but right picture has [border="0"] then line is only blue frame. <IMG src="../photo/brussels/s_gp002.jpg" width="208" height="156" hspace="2" vspace="2" border="0"> |
||||||||||||||||||||||||||||||||||||||||||||||||||||||||||||||||||||||||||||||||||||||||||||||||||||||||||||
| (955) 2003/9/3 | 166 PhotoShop Each country is added shade in the world map and it seems
to be more three dimensional Layer style is very convenient for this kind of world map because each
country can be added shade depending upon the shape of the country map.
Same as putting a shade to a photo, shade can be added into each layer.
Adding shade to each layer will be done just same as to make it for a photo.
Map without shade is monotonous but solidarity appearance comes up with shade and the map became lively. Layer style is very convenient for this kind of world map because each
country can be added shade depending upon the shape of the country map.
Same as putting a shade to a photo, shade can be added into each layer.
Adding shade to each layer will be done just same as to make it for a photo.
Map without shade is monotonous but solidarity appearance comes up with shade and the map became lively.One thing to notice is the light direction. Even there are many layers but light direction is set only one angle. If light direction will be set in a layer, all the other layers are set in the same direction. This sample makes 170 light and game it a shade. Right under light (-45 degree) was trailed but China and India seemed to be put on Russia. That was not natural. Simple area like Africa or south America will be set the distance (D) as 3px, size (S) as 3px and like China or India, complicated shape and be anticipated to affect to other country shape, those countries were set degree (D) as 2px, size (S) as 2px to make shade smaller. |
||||||||||||||||||||||||||||||||||||||||||||||||||||||||||||||||||||||||||||||||||||||||||||||||||||||||||||
| (951) 2003/8/30 | 165 PhotoShop Shade can add three dimensional atmosphere
|
||||||||||||||||||||||||||||||||||||||||||||||||||||||||||||||||||||||||||||||||||||||||||||||||||||||||||||
| 2003/08/30 | Search can be done with fresh-eye of Japan provider This is Japanese only but even in the personal web, search engine can be displayed. It is not used now because web page looks complicated because there are so many items. <FORM name="search_link2" action="http://search.fresheye.com/" method="get" target="_blank"> <TABLE cellspacing="0" cellpadding="0" border="0"> <TBODY> <TR> <TD width="110"><A href="/" target="_blank"> <IMG src="http://www.fresheye.com/guide/img/search_fe.gif" border="0" alt="fresh eye"></A></TD> <TD width="356"> <INPUT type="text" name="kw" size="20"> <INPUT type="hidden" name="rt" value=""> <INPUT type="submit" name="submit1" value="Web search" onClick="search_link2.rt.value='';"> <INPUT type="submit" name="submit2" value="News" onClick="search_link2.rt.value='nfnews';"> </TD> </TR> </TBODY> </TABLE> </FORM> |
||||||||||||||||||||||||||||||||||||||||||||||||||||||||||||||||||||||||||||||||||||||||||||||||||||||||||||
| (950) 2003/8/29 | 164 PhotoShop Campus size change to add shade to a photo In [Layer -> new], [from background to layer] will be chosen. To change background photo into layer makes it be edited. Then campus size will be changed by adding shade width. Width and height will be changed by [image -> campus size] by changing from mm to pixel. Top page photos are enlarged 5 pixel. Reference position is set center in the default setting and then change it from center to put the arrow to the left upper block. Actual shade can be put on under right oppositely. |
||||||||||||||||||||||||||||||||||||||||||||||||||||||||||||||||||||||||||||||||||||||||||||||||||||||||||||
| (941) 2003/8/20 |
163 HotMedia file can be reduced by gif file than jpg in some cases When making animation by HotMedia, size of HotMedia differs by the original file's property. Jpg or gif is generally used as original picture file. Usually jpg file is smaller than gif because it is a compressed file. However small, less colors and simple picture is different and sometimes gif becomes smaller than jpg. This title picture is that kind of sample and jpg is 20kB, gif is 7kB, that is one third of jpg. Because original file's size is different then same output HotMedia files are different. Generally speaking, picture will be made as jpg, but this time I made the file by jpg again and file size became bigger than the former gif file, then I wondered why. That is starting point of the size of jpg and gif. |
||||||||||||||||||||||||||||||||||||||||||||||||||||||||||||||||||||||||||||||||||||||||||||||||||||||||||||
| (935) 2003/8/14 | 162 PhotoShop Set effects to character such as shade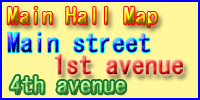 Once character layer is made with shade for example, from 2nd time, that
layer is copied to revise. It is convenient. First to make character layer
is to click "T" icon in the tool box. That character tool is
used to write characters. Then double click the layer [Layer style] window
pops up and set in this window. Once character layer is made with shade for example, from 2nd time, that
layer is copied to revise. It is convenient. First to make character layer
is to click "T" icon in the tool box. That character tool is
used to write characters. Then double click the layer [Layer style] window
pops up and set in this window.
|
||||||||||||||||||||||||||||||||||||||||||||||||||||||||||||||||||||||||||||||||||||||||||||||||||||||||||||
| (934) 2003/8/13 | 161 Setting of HotMedia animation wizard Wizard goes 1. Choose picture file -> 2. setting of hot link -> 3. set of transition -> 4. setting of display
|
||||||||||||||||||||||||||||||||||||||||||||||||||||||||||||||||||||||||||||||||||||||||||||||||||||||||||||
| (933) 2003/8/12 | 160 Insert character display when mouse is put on HotMedia animation
|
||||||||||||||||||||||||||||||||||||||||||||||||||||||||||||||||||||||||||||||||||||||||||||||||||||||||||||
| (921) 2003/7/31 | 159 Putting color frame to pictures located in a table
This sample uses one row and five columns and blank space in cell is set as 3 pixels. When background color is changed as in each cell, each picture can get different frame color. But when making frame by using table blank space, pixel of up-down and left-right can not be changed. |
||||||||||||||||||||||||||||||||||||||||||||||||||||||||||||||||||||||||||||||||||||||||||||||||||||||||||||
| (920) 2003/7/30 | 158 Color frame of pictures which have different vertical and horizontal
size
Like this sample, night pictures with night background are expected a frame to make border clear. And frame color should be fixed as designated color. To make this kind of frame, a table of one row and one column will be inserted into a table cell and the background will be colored blue and then to make frame space pixel is decided as blank space within cell. This procedure makes frames even if picture size are different, fixed color and space frame is made because a picture is set in a table of one row and one column. |
||||||||||||||||||||||||||||||||||||||||||||||||||||||||||||||||||||||||||||||||||||||||||||||||||||||||||||
| (905) 2003/7/14 | 157 Fringing with color to panorama picture - part 2 I thought of a good idea. It is same as to insert a table instead of frame. It inserts one row one column table. Changing cell background color as [right click of the table -> property change]. Then assign pixel by [table -> margin within cell] Above blue frame is made by this method as 4 dots fringe. |
||||||||||||||||||||||||||||||||||||||||||||||||||||||||||||||||||||||||||||||||||||||||||||||||||||||||||||
| (896) 2003/7/5 | 156 Fringing with color to panorama picture As this sample, when a picture and cell background color is same like this white, having fringe to the picture make it clear. Making the cell, which stores the picture, a little bigger than the picture (2 or 3 pixel bigger both vertically and horizontally) and coloring the cell of background, look like a fringe. Upper red fringe picture is one of this kind of fringe. Inserting a table of one row and one column, HotMedia scroll image is inserted into the table. Horizontally 2 dots and vertically 3 dots are added to make red fringe. These different dots appear to be same width both vertical and horizontal red fringe. If vertical and horizontal dots are same then vertical looks smaller than horizontal. |
||||||||||||||||||||||||||||||||||||||||||||||||||||||||||||||||||||||||||||||||||||||||||||||||||||||||||||
| (890) 2003/6/29 | 155 PhotoShop Background blurring - part 3. using both selected area and
layer
|
||||||||||||||||||||||||||||||||||||||||||||||||||||||||||||||||||||||||||||||||||||||||||||||||||||||||||||
| (889) 2003/6/28 | 154 PhotoShop Background blurring - part 2. assigning selected area and
blurring within and without the area
|
||||||||||||||||||||||||||||||||||||||||||||||||||||||||||||||||||||||||||||||||||||||||||||||||||||||||||||
| (888) 2003/6/27 | 153 PhotoShop Background blurring - part 1. using layer and eraser
|
||||||||||||||||||||||||||||||||||||||||||||||||||||||||||||||||||||||||||||||||||||||||||||||||||||||||||||
| (887) 2003/6/26 | 152 PhotoShop Make the background blurred by [filter -> blurring (Gauss)]
Gauss can set amount of blurring. A little blurring and avoiding noise can be gotten by the amount of blurring as radius 0.5 to 1.5 pixel. Full blurring such as flower background is set the radius between 3 and 6. If the value will exceed 8 pixel, it becomes true blurring and it makes difficult to understand the shape. |
||||||||||||||||||||||||||||||||||||||||||||||||||||||||||||||||||||||||||||||||||||||||||||||||||||||||||||
| (866) 2003/6/5 | 151 PhotoShop Blurring edge of the selected area
|
||||||||||||||||||||||||||||||||||||||||||||||||||||||||||||||||||||||||||||||||||||||||||||||||||||||||||||
| (865) 2003/6/4 | 150 PhotoShop Selected area or layer movement is useful to use [+Ctrl] Layer movement is done by clicking movement tool in the tool box. But sometimes it happens that after usage of selection tool, [copy -> paste] could make new layer and that is going to be moved. At that time without going back to movement tool and click, even in the condition of rectangular tool or polygon selection tool, it makes to move layer by dragging simultaneously mouse and Ctrl key. After determination of selected area, mouse + Ctrl can move that area but it should be noted that the original figure of the area will be removed. |
||||||||||||||||||||||||||||||||||||||||||||||||||||||||||||||||||||||||||||||||||||||||||||||||||||||||||||
| (864) 2003/6/3 | 149 PhotoShop Save and read the selected area Selection area is decided by polygon selection tool etc. After long time and set of complicated shape, that area will be colored differently or edited differently, sometime this kind of arrangement will be done for the same area. [selection area -> save selected area] can save and [selection area -> read selection area] can read the area again and different edition can be done for the area. |
||||||||||||||||||||||||||||||||||||||||||||||||||||||||||||||||||||||||||||||||||||||||||||||||||||||||||||
| (863) 2003/6/2 | 148 PhotoShop While selection area editing, one point back to re-edit When polygon selection tool is used to define selected area, on editing, sometimes it may happen that this is not a point that I wanted to mark and to go back to the point before. If one point back is expected, Back Space or Delete key is used. To try to start from the beginning uses Esc key. |
||||||||||||||||||||||||||||||||||||||||||||||||||||||||||||||||||||||||||||||||||||||||||||||||||||||||||||
| (861) 2003/5/31 | 147 PhotoShop Addition and deletion of selected area By polygon selection tool etc., selection area is decided then editing, such as color tone adjustment, will begin. Usually [new selection] will be selected to decide this selection area and it begins true new area. [Add with selected area] or [remove from the current selected area] icon in the left side of the option bar can add or remove the selected area. Addition or removal can freely be chosen on editing. |
||||||||||||||||||||||||||||||||||||||||||||||||||||||||||||||||||||||||||||||||||||||||||||||||||||||||||||
| (814) 2003/4/12 | 146 PhotoShop To fringe characters, border line is used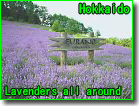 Light green characters of Hokkaido with light blue background are sometimes
difficult to read, then border line is used to fringe the characters. Light green characters of Hokkaido with light blue background are sometimes
difficult to read, then border line is used to fringe the characters.
|
||||||||||||||||||||||||||||||||||||||||||||||||||||||||||||||||||||||||||||||||||||||||||||||||||||||||||||
| (811) 2003/4/9 | 145 PhotoShop Panorama picture by using [deformation] Panorama picture is usually made by a panorama software. As to use panorama
raw materials, photos should be taken carefully in order to lap both ends
of a picture. But using [deformation] of PhotoShop, [rotation] and [enlarge
and reduction] can combine into one panorama photo. Panorama picture is usually made by a panorama software. As to use panorama
raw materials, photos should be taken carefully in order to lap both ends
of a picture. But using [deformation] of PhotoShop, [rotation] and [enlarge
and reduction] can combine into one panorama photo. |
||||||||||||||||||||||||||||||||||||||||||||||||||||||||||||||||||||||||||||||||||||||||||||||||||||||||||||
| (810) 2003/4/8 | 144 PhotoShop Layer usage This photo is a typical deformation. Europe and Asia are expressed several
times bigger than actual size. On the contrary, Africa and America are
small. It is a result that area, which is interesting, or going to expressed
in detail, are emphasized. Layer expression is convenient to make this
kind of figure. Sometimes it may happen to change a country later. When
countries are defined by layer, each country can be easily changed. And
also country name can be added freely by layer. Country name can be moved
and place it adequate location. This photo is a typical deformation. Europe and Asia are expressed several
times bigger than actual size. On the contrary, Africa and America are
small. It is a result that area, which is interesting, or going to expressed
in detail, are emphasized. Layer expression is convenient to make this
kind of figure. Sometimes it may happen to change a country later. When
countries are defined by layer, each country can be easily changed. And
also country name can be added freely by layer. Country name can be moved
and place it adequate location. |
||||||||||||||||||||||||||||||||||||||||||||||||||||||||||||||||||||||||||||||||||||||||||||||||||||||||||||
| (791) 2003/3/20 | 143 PhotoShop Color saturation change can make photos brilliant
|
||||||||||||||||||||||||||||||||||||||||||||||||||||||||||||||||||||||||||||||||||||||||||||||||||||||||||||
| (753) 2003/2/10 | 142 Give color to lines and make the line thickness as one - part.3 Table line can be defined as one doted-line and not 2 lines. This brings same line as expressed normal line such as in Excel.
|
||||||||||||||||||||||||||||||||||||||||||||||||||||||||||||||||||||||||||||||||||||||||||||||||||||||||||||
| (427) 2003/2/3 | 140 Set table width at the beginning The pages, which show actual thumbnail photos, are structured 4 columns table. The table contains thumbnail photos and explanation letters above or under of the photos. Many letters sometimes get the table size bigger. To protect this, values, that is bigger than the width of 4 column photos, are put at first. This page's example is [width="820"]. This avoids the table becomes bigger than the width of photo width x 4 columns. |
||||||||||||||||||||||||||||||||||||||||||||||||||||||||||||||||||||||||||||||||||||||||||||||||||||||||||||
| (735) 2003/1/22 | 137 PhotoShop After color assignation, fully painted by color fulfill or
like that Color can be changed all at once by using [edit -> fulfill panting] after assignation of the color to be changed. |
||||||||||||||||||||||||||||||||||||||||||||||||||||||||||||||||||||||||||||||||||||||||||||||||||||||||||||
| (734) 2003/1/21 | 136 PhotoShop Color area is assigned by [color assignation] Dialogue is shown by [chosen area -> color area assignation]. Each items are set as follows. (1)Selection -> assigned color area (2)tolerance -> move slide, or, input value of 0-200 (3)[Display picture] is chosen from [selected area] or [display picture] (4)[Black mat] is chosen as the pre-view selected area. (5)Pointer is clicked on the picture or pre-view area to assign that color. Another choice is from color system. Selection can be done from red series, yellow, green, cyan, blue, magenda. After the color assignation, tolerance slide can decide color tone area. The bigger the value becomes, the wider the color area will be assigned. When selected area is chosen, color is picked from the picture directly but pre-view is not shown. Pre-view is easier to see for the black mat which displays assigned color on the black back. |
||||||||||||||||||||||||||||||||||||||||||||||||||||||||||||||||||||||||||||||||||||||||||||||||||||||||||||
| (733) 2003/1/20 | 135 PhotoShop Color assignation can change assigned color all at once
This sample shows by using [chosen area -> color area assignation] assigns and change the color by [edit -> paint fully] |
||||||||||||||||||||||||||||||||||||||||||||||||||||||||||||||||||||||||||||||||||||||||||||||||||||||||||||
| (731) 2003/1/18 | 133 Edit of link using part of picture By correcting the world map for example, sometimes link location and actual map circle dislocate. At that time link should be changed. Image map editor is activated by [right click -> image edit -> image map edit] Already made circle and so on are displayed as circle or square then click them and edit such as enlarging, shrinking or to move. |
||||||||||||||||||||||||||||||||||||||||||||||||||||||||||||||||||||||||||||||||||||||||||||||||||||||||||||
| (730) 2003/1/17 | 132 PhotoShop Layer copy Map on top page is made in both Japanese and English. Layer structure is used by area. This map is revised step by step. On changing the map, area correction done by Japanese layer will be used in English version. In order to achieve this, Japanese and English versions are opened simultaneously. Japanese version is corrected at first and assign move tool in the tool box. By drag and drop Japanese version into English version, it can be copied automatically. |
||||||||||||||||||||||||||||||||||||||||||||||||||||||||||||||||||||||||||||||||||||||||||||||||||||||||||||
| (694) 2002/12/10 | 130 PhotoShop Deformation can reverse horizontally or vertically   Center picture was reversibly deformed with left and right horizontal direction
like mirror image. It is like being folded by the center line of right
or left perpendicular line. Center picture was reversibly deformed with left and right horizontal direction
like mirror image. It is like being folded by the center line of right
or left perpendicular line.Right photo is reverse of upside-down. It is like being folded by horizontal line of top or bottom. It is done by [edit -> deformation -> reverse horizontally] or [edit -> deformation -> reverse vertically] |
||||||||||||||||||||||||||||||||||||||||||||||||||||||||||||||||||||||||||||||||||||||||||||||||||||||||||||
| (693) 2002/12/9 | 129 PhotoShop Deformation can be applied to cut or copy of any figure 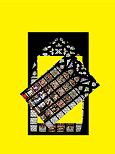 By using rectangular selection tool or polygon selection tool, after selecting
a figure and use deformation command. Only selected part can be deformed.
After selecting an area by selection tool, use deformation commands such
as [edit -> deformation -> rotation] By using rectangular selection tool or polygon selection tool, after selecting
a figure and use deformation command. Only selected part can be deformed.
After selecting an area by selection tool, use deformation commands such
as [edit -> deformation -> rotation]If assigned area will be left as it used to be, final key such as rotation is pushed with Alt key at the same time. Simultaneous pushing is important. Only Alt key does not deform and without Alt key, it makes cut and rotation. |
||||||||||||||||||||||||||||||||||||||||||||||||||||||||||||||||||||||||||||||||||||||||||||||||||||||||||||
| (692) 2002/12/8 | 128 PhotoShop Deformation of free deform 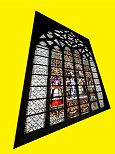 Distortion can only be done along a side but [free deform] provides very
little limitation and move a handle to anywhere and brings free deformation.
After assigning the correction layer, a handle will be moved by [edit ->
deformation -> free deform]. Distortion can only be done along a side but [free deform] provides very
little limitation and move a handle to anywhere and brings free deformation.
After assigning the correction layer, a handle will be moved by [edit ->
deformation -> free deform].To repeat this deformation action, [edit -> deformation -> re-execute] Before determining action, plural successive commands can be done. For example, repetition of [perspective -> enlarge and shrink] can be repeated and finally determination action will be done. |
||||||||||||||||||||||||||||||||||||||||||||||||||||||||||||||||||||||||||||||||||||||||||||||||||||||||||||
| (691) 2002/12/7 | 127 PhotoShop Deformation of distortion 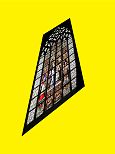 When proportionally deformation will be desired, [distortion] is used.
Right sample displays that a handle on every corner moving, followed upon
one side, can make distortion. Distortion can deform only following one
side then if deformation will be done freely, [free deform] is used. Distortion
is activated by [edit -> deformation -> distortion] after assigning
correction layer. When proportionally deformation will be desired, [distortion] is used.
Right sample displays that a handle on every corner moving, followed upon
one side, can make distortion. Distortion can deform only following one
side then if deformation will be done freely, [free deform] is used. Distortion
is activated by [edit -> deformation -> distortion] after assigning
correction layer.To decide deformation, push enter key or push [determine deformation] in the option bar right side. To cancel deformation, push Esc key or push [cancel deformation] in the option bar right side. |
||||||||||||||||||||||||||||||||||||||||||||||||||||||||||||||||||||||||||||||||||||||||||||||||||||||||||||
| (690) 2002/12/6 | 126 PhotoShop Deformation of rotating 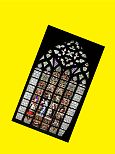 Yellow background layer will not be rotated and specific layer only is
rotated. After assigning a layer, which is going to be corrected, [edit
-> deformation -> rotating]. Four corners will pop up rotating handles
and the figure will be rotated by the handles. When rotating, by pushing
shift key at the same time, rotating angle is fixed by 15 degree unit. Yellow background layer will not be rotated and specific layer only is
rotated. After assigning a layer, which is going to be corrected, [edit
-> deformation -> rotating]. Four corners will pop up rotating handles
and the figure will be rotated by the handles. When rotating, by pushing
shift key at the same time, rotating angle is fixed by 15 degree unit.Center of rotation is set in a center of the layer as a default but the center can be moved. Anchoring point is decided by clicking one of nine places which is in the left side of the option bar and pops up window-like mark. Anchoring point can be set by inputting horizontal and vertical distance from option bar. Or any rotating angle can be directly input from [set of rotation] in the option bar. |
||||||||||||||||||||||||||||||||||||||||||||||||||||||||||||||||||||||||||||||||||||||||||||||||||||||||||||
| (689) 2002/12/5 | 125 PhotoShop Deformation of enlargement and shrink  Perspective method shrinks lower part of the window then the window seems
to be longer in longitudinal. In order to correct this ratio, [enlarge
and shrink] is used. After appointing the layer, which is going to be corrected,
by using [edit -> deformation -> enlarge and shrink] a handle will
pop up. With a handle gripping and moving figure can correct the longitudinal
and width ratio. Perspective method shrinks lower part of the window then the window seems
to be longer in longitudinal. In order to correct this ratio, [enlarge
and shrink] is used. After appointing the layer, which is going to be corrected,
by using [edit -> deformation -> enlarge and shrink] a handle will
pop up. With a handle gripping and moving figure can correct the longitudinal
and width ratio.By longitudinal direction or widthwise, or simultaneously with both longitudinal and wide, enlarge or shrink can be done. When longitudinal and wide direction are simultaneously processed, if the corner handle and shift key will be used simultaneously, then aspect ration can be maintained and be dragged. |
||||||||||||||||||||||||||||||||||||||||||||||||||||||||||||||||||||||||||||||||||||||||||||||||||||||||||||
| (688) 2002/12/4 | 124 PhotoShop Deformation of perspective can correct difference of perspective 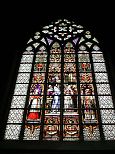 Deformation can apply to each layer individually. Thai is one of useful
points. After appointing editing layer, one point perspective method can
be applied by [edit -> deformation -> perspective method] Drag corners
will pop up and then correction will be done by using perspective method
of up/down and right/left. Left original stained glass was looked upward
and then width of upper and lower end of the window are same length but
the photo seems to be extreme trapezoid. Right photo was corrected by perspective
method and lower window was reduced. Background yellow was used for easily
understood. Deformation can apply to each layer individually. Thai is one of useful
points. After appointing editing layer, one point perspective method can
be applied by [edit -> deformation -> perspective method] Drag corners
will pop up and then correction will be done by using perspective method
of up/down and right/left. Left original stained glass was looked upward
and then width of upper and lower end of the window are same length but
the photo seems to be extreme trapezoid. Right photo was corrected by perspective
method and lower window was reduced. Background yellow was used for easily
understood. If this kind of deformation command is applied not vector image such as pass but to bit map image, each action loses image sharpness, then determination is recommended lastly after some kinds of deformation process. |
||||||||||||||||||||||||||||||||||||||||||||||||||||||||||||||||||||||||||||||||||||||||||||||||||||||||||||
| (668) 2002/11/15 | 123 Replay only one command Select a replay command. In action pallet, with pushing Ctrl key, click [replay selected item] button. Or with pushing Ctrl key, replaying command will be double clicked. |
||||||||||||||||||||||||||||||||||||||||||||||||||||||||||||||||||||||||||||||||||||||||||||||||||||||||||||
| (667) 2002/11/14 | 122 Rearrangement of actions or commands In the action pallet, re-allocated action or commands will be drag-and-dropped to new place. |
||||||||||||||||||||||||||||||||||||||||||||||||||||||||||||||||||||||||||||||||||||||||||||||||||||||||||||
| (666) 2002/11/13 | 121 Record addition commands When selecting action name, new command can be inserted into the last part of the action. Or when selecting command name, new command is inserted just after the command. Click record start button. Additional commands will be recorded. To stop the record, click [replay/record stop] button. |
||||||||||||||||||||||||||||||||||||||||||||||||||||||||||||||||||||||||||||||||||||||||||||||||||||||||||||
| (665) 2002/11/12 | 120 Exclusion of command For developing the list name in action command, right triangle symbol of the action will be clicked. Commands, which should be excluded, are checked the L-like symbol just left of the command. One more check can insert the command again. By this proceeding, not-used action can be selected and it makes more useful. |
||||||||||||||||||||||||||||||||||||||||||||||||||||||||||||||||||||||||||||||||||||||||||||||||||||||||||||
| (662) 2002/11/8 | 119 Action pre-set can activate successively in PhotoShop 7.0 Change action name Double click on action name can change name. |
||||||||||||||||||||||||||||||||||||||||||||||||||||||||||||||||||||||||||||||||||||||||||||||||||||||||||||
| (661) 2002/11/7 | 118 Action pre-set can activate successively in PhotoShop 7.0 New action making By clicking [new action making] in the lower part of action pallet. Then [input action name -> allocate shortcut key for the action -> allocation of color on displaying button mode] Click [record] button changes record start button into red color. Choose commands and proceed recording operation. To stop the record, [replay/stop recording] button will be clicked or choose [recording stop] button in action pallet menu or push Esc key. To restart same action record, [re-recording] is selected from the triangle symbol of action pallet menu. |
||||||||||||||||||||||||||||||||||||||||||||||||||||||||||||||||||||||||||||||||||||||||||||||||||||||||||||
| (660) 2002/11/6 | 117 Action pre-set can activate successively in PhotoShop 7.0 Proceed the chosen action Click the triangle style icon [playback selected item] in lower part of the action pallet or choose [replay] command from the menu of triangle symbol in right upper part. |
||||||||||||||||||||||||||||||||||||||||||||||||||||||||||||||||||||||||||||||||||||||||||||||||||||||||||||
| (659) 2002/11/5 | 116 Action pre-set can activate successively in PhotoShop 7.0 Selection of action Click action name. To chose plural action, click action name with Shift key simultaneously. |
||||||||||||||||||||||||||||||||||||||||||||||||||||||||||||||||||||||||||||||||||||||||||||||||||||||||||||
| (658) 2002/11/4 | 115 Action pre-set can activate successively in PhotoShop 7.0 Action pre-set is like macro in Excel and can be done successively. It is a very useful command. Making action pallet Action pallet comes up in a same pallet as history by [window -> action] |
||||||||||||||||||||||||||||||||||||||||||||||||||||||||||||||||||||||||||||||||||||||||||||||||||||||||||||
| (646) 2002/10/23 | 114 Clearly display the figure edge. figure fringe can be fit with surround
color Unti-alias and move or paste command of selected area sometimes happens to become boundary fringe which pixels are included within selected area. [Mat command] can eliminate surrounding fringe. After move or paste, By using [layer -> matting -> fringe elimination], fringe colors are substituted by near colors. For example, Blue back and yellow figure can be selected and move is selected then blue fringe will be moved together. By using fringe elimination, blue can be substituted by yellow. Substituting width is assigned as pixel unit. 1 or 2 pixel is enough. Black mat elimination or white mat elimination is for monotonous background then normally they are not used. |
||||||||||||||||||||||||||||||||||||||||||||||||||||||||||||||||||||||||||||||||||||||||||||||||||||||||||||
| (644) 2002/10/21 | 112 Tool pre-set can save original tool set in PhotoShop 7.0 Every tool can be customized and registered with different name to be used in a different scene. For example, different character font can be used at different scene or brush set is restored for ourselves. These pre-set can be called again from tool pre-set stored in a same pallet as history pallet. |
||||||||||||||||||||||||||||||||||||||||||||||||||||||||||||||||||||||||||||||||||||||||||||||||||||||||||||
| (643) 2002/10/20 | 111 Automatic color adjustment is added in PhotoShop 7.0 Automatic level adjust was already in the PhotoShop and this automatic color adjustment was added in 7.0, which changes color tone. |
||||||||||||||||||||||||||||||||||||||||||||||||||||||||||||||||||||||||||||||||||||||||||||||||||||||||||||
| (642) 2002/10/19 | 110 Customize of work space in PhotoShop 7.0 Color, history, layer or character pallet can be located and stored as customized work space. Name it and use later according to scene. |
||||||||||||||||||||||||||||||||||||||||||||||||||||||||||||||||||||||||||||||||||||||||||||||||||||||||||||
| (641) 2002/10/18 | 109 Own pattern making is possible by pattern maker in PhotoShop 7.0 |
||||||||||||||||||||||||||||||||||||||||||||||||||||||||||||||||||||||||||||||||||||||||||||||||||||||||||||
| (640) 2002/10/17 |
108 Photoshop 7.0 Repair brush tool and patch tool are convenient Repair brush can consequently restore by dragging. Patch tool can change an area at one time. Face with wrinkles can be easily changed into smooth face. Dirty spot in a picture can be restored just at one time. Shade and shadow or texture information are calculated by the copied part and automatically restores a picture. Then even after sampling different color tone point, original part will be restored naturally and the area will be matched with surrounded atmosphere. Completed picture looks very natural and it is convenient tool. |
||||||||||||||||||||||||||||||||||||||||||||||||||||||||||||||||||||||||||||||||||||||||||||||||||||||||||||
| (639) 2002/10/16 | 107 File browser added in PhotoShop 7.0 Browser is added in PhotoShop 7.0. It seems to me too late because all this kind of current image software in Windows have browser. On viewing a picture, photos can rotate with 90/180 degree. Exif information also will be shown and edition can be proceed with confirming filmed day or time. |
||||||||||||||||||||||||||||||||||||||||||||||||||||||||||||||||||||||||||||||||||||||||||||||||||||||||||||
| (601) 2002/9/8 | 106 Horizontal line default is 2 pixel Default horizontal line is displayed by 2 pixel. When line width is assigned as one pixel then it became one dot line of minimum. |
||||||||||||||||||||||||||||||||||||||||||||||||||||||||||||||||||||||||||||||||||||||||||||||||||||||||||||
| (600) 2002/9/7 | 105 Special list display without indent List is shown a <LI> row between <UL> and </UL> by html source. List display shows upper and lower blank space and automatic front indent. To avoid both this one blank space and indent is to delete both <UL> and </UL> rows in the html source. But HomePage Builder strictly prohibits grammatically and then even if they are deleted in the source, when going back to page edit, grammar correction may add <UL> and </UL>. Then <UL> and </UL> rows must be deleted by a editor. However after this editing, it can not be edited by HomePage Builder and then it is not recommendable. Sample of history shows normal list and without indent list. |
||||||||||||||||||||||||||||||||||||||||||||||||||||||||||||||||||||||||||||||||||||||||||||||||||||||||||||
| (599) 2002/9/6 | 104 No line feed<NOBR> According to width of the page, usually long row is automatically folded. Row of <NOBR> and </NOBR> do not fold. Refer to history page and try to change width of Internet explorer. No folding will be experienced. This is not allowed in the HomePage Builder and then it is shown as red. But it works. It must be written directly into html source. |
||||||||||||||||||||||||||||||||||||||||||||||||||||||||||||||||||||||||||||||||||||||||||||||||||||||||||||
| (597) 2002/9/4 | 103 Same name as in files and folders is not allowed in Windows XP At first, this web was made by Windows 98. Instructed structure of this page was that a file of "index.htm" and a folder of "index.files" were in a same folder named "homepage." It was possible in Windows98. But in Windows XP could not use like this. When the file of "index.htm" was deleted, then the folder of "index.files" was deleted too. Then I change the folder name from "index.files" to "main." |
||||||||||||||||||||||||||||||||||||||||||||||||||||||||||||||||||||||||||||||||||||||||||||||||||||||||||||
| (588) 2002/8/26 | 102 Windows XP can not be used Java!!! August 11, 2002, I installed Windows XP Professional on my newly constructed PC and I found that the title of may web page as YUME or dreams could not move. Probably PC assembler will build in Java by themselves. But original Windows XP does not include Java program. This program can install Windows XP Java automatically. Be care of file size as 11MB. If you do not want automatic install, down load from here. |
||||||||||||||||||||||||||||||||||||||||||||||||||||||||||||||||||||||||||||||||||||||||||||||||||||||||||||
| (577) 2002/8/15 | 101 List display without showing first symbol
<LI>To avoid this space and without symbol <HR> expressed like this. <LI>Horizontal line and characters are shown without symbol. </UL> In the HTML source, not to display symbol is to delete <LI> which means list row. |
||||||||||||||||||||||||||||||||||||||||||||||||||||||||||||||||||||||||||||||||||||||||||||||||||||||||||||
| (576) 2002/8/14 | 100 Using style sheet - costumes horizontal line Horizontal line is inserted by [insert -> horizontal line] but default setting is gray color. Style sheet can customize it. Item is [HR]. Provided items are color by [color and background], location by left, upper, width and height as pixel or % expression. [Layout -> style] can assign line variation such as dotted line, dashed line, solid line, double line and dimple(it looks hollow because designated color is under right and by adding gray at lower right and upper left), embossed lettering(assigned color is located at center and outside is covered by gray color, inset inset (resembles with embossed and around assigned color is designated as gray. Assigned color is seen dimple like by contrast) and outset(Opposite to inset, and looked center designated color in center seems embedded outside) This sample horizontal line is only assigned color. |
||||||||||||||||||||||||||||||||||||||||||||||||||||||||||||||||||||||||||||||||||||||||||||||||||||||||||||
| (570) 2002/8/8 | 99 PhotoShop Draw lines of square or circle and so on。 On pictures of top page, frame blue line is drawn. Those lines were made
form at first. By using square choice tool or elliptical tool, [edit ->
draw borderline] is selected. It can be chosen that is line width, color,
line location of inside, outside or center. Line width is assigned by pixel
and color is set by drawing color in the pallet. Circles in the top page
map were drawn by this way. On pictures of top page, frame blue line is drawn. Those lines were made
form at first. By using square choice tool or elliptical tool, [edit ->
draw borderline] is selected. It can be chosen that is line width, color,
line location of inside, outside or center. Line width is assigned by pixel
and color is set by drawing color in the pallet. Circles in the top page
map were drawn by this way.Like a frame of a picture, when a whole picture is selected, by using [selection area -> whole selection] whole picture is chosen without using square tool. |
||||||||||||||||||||||||||||||||||||||||||||||||||||||||||||||||||||||||||||||||||||||||||||||||||||||||||||
| (569) 2002/8/7 | 98 PhotoShop gif picture can be edited Gif picture also can be edited by [image -> mode -> index color -> RGB color] Without this conversion, edit can not be done. |
||||||||||||||||||||||||||||||||||||||||||||||||||||||||||||||||||||||||||||||||||||||||||||||||||||||||||||
| 2002/07/25 | Link using a part of a picture
|
||||||||||||||||||||||||||||||||||||||||||||||||||||||||||||||||||||||||||||||||||||||||||||||||||||||||||||
| (526) 2002/6/25 | 97 Display 360 degree panorama picture by HomePage Builder This photo is not a real 360 degree panorama but always scrolling make s it like a 360 degree panorama picture. If a real 360 degree panorama picture is made, of course it is displayed as 360 degree panoramic picture. |
||||||||||||||||||||||||||||||||||||||||||||||||||||||||||||||||||||||||||||||||||||||||||||||||||||||||||||
| (525) 2002/6/24 | 96 Display panorama picture by HomePage Builder If operation buttons are felt burdensome, pushing arrow at left diminish buttons and one more push can appear again. In the wizard, setting without buttons is possible. |
||||||||||||||||||||||||||||||||||||||||||||||||||||||||||||||||||||||||||||||||||||||||||||||||||||||||||||
| (496) 2002/5/26 | 95 Using style sheet - assign color of link character Character color or size of link can also be fixed by style sheet.
|
||||||||||||||||||||||||||||||||||||||||||||||||||||||||||||||||||||||||||||||||||||||||||||||||||||||||||||
| (495) 2002/5/25 | 94 Using style sheet - assign character size, color and background color
of a table Characters within a table also can be fixed by a style sheet.
|
||||||||||||||||||||||||||||||||||||||||||||||||||||||||||||||||||||||||||||||||||||||||||||||||||||||||||||
| (494) 2002/5/24 | 93 Using style sheet - assign front mark of list expression Normal unnumbered list insert provide the front symbol as little black circle. When background of a web is black, black symbol can not distinct from the black background. some symbols have been made beforehand by HomePage Builder or others as gif format such as dot_yellow.gif. This sample changes from the original black dot to the assigned picture of
|
||||||||||||||||||||||||||||||||||||||||||||||||||||||||||||||||||||||||||||||||||||||||||||||||||||||||||||
| (493) 2002/5/23 | 92 Using style sheet - assign background picture Sample of [night.css]
|
||||||||||||||||||||||||||||||||||||||||||||||||||||||||||||||||||||||||||||||||||||||||||||||||||||||||||||
| (492) 2002/5/22 | 91 Using style sheet - assign character size and color Style sheet is very convenient and some style sheets, which were made previously, can set freely font color, size or dot mark of list display etc. I started to copy style sheet of HomePage Builder and change it for myself. There are sample style sheet files in [c:/Program Files/IBM Homepage Builder V8/sample/css] Those file names start from a01.css and have extension of [css]. Those files are copied to my own folder and name them. For the night scene pattern, I named it [night.css]. To edit the file, style sheet manager comes up by [format -> style], then [night.css] is designated by [link -> right side of external style sheet name]. This sample changes font color and size in the body text.
|
||||||||||||||||||||||||||||||||||||||||||||||||||||||||||||||||||||||||||||||||||||||||||||||||||||||||||||
| (481) 2002/5/11 | 90 PhotoShop Create blue sky on a cloudy day -2 using cloud filter
(1) Layer -> new -> from background to layer -> OK (layer 0 will be created) (2) Layer -> new -> layer -> OK (layer 1 becomes) (3) Drawing color and background color is set blue sky and cloud respectively. blue sample (R:168, G:199, B:246) and cloud (R:232, G:239, B:255) (4) filter -> draw -> cloud pattern 1 makes layer 1 to cloud. (5) Change layer 0 and layer 1 to make cloud under. (6) To cut upper part of layer 0, automatic choice too will define cut area. (7) If automatic choice tool does not work well, polygon choice tool can delete roughly and eraser tool deletes in detail. By deleting upper part of layer 0 copy, lower cloud is coming up. (8) Layer -> connection with under layer(Ctrl+E) and save the duplication. Different layer can set cloud brightness and statue brightness separately. This almost black picture can be revived like this. |
||||||||||||||||||||||||||||||||||||||||||||||||||||||||||||||||||||||||||||||||||||||||||||||||||||||||||||
| (480) 2002/5/10 | 89 PhotoShop Create blue sky on a cloudy day - 1
(1) Layer -> new -> from background to layer -> OK (layer 0 became) (2) Layer -> duplication of layer -> OK (copy of layer 0 can be done) (3) Copy cloud picture on layer 0 from other picture. (4) To cut off the area above the roof on copy of layer 0, deletion area will be assigned by automatic choice tool. (5) If the automatic choice tool may not work well, polygon choice tool can delete roughly and eraser tool deletes in detail. By deleting upper part of layer 0 copy, lower cloud is coming up. (6) Layer -> connection with under layer(Ctrl+E) and save the duplication. |
||||||||||||||||||||||||||||||||||||||||||||||||||||||||||||||||||||||||||||||||||||||||||||||||||||||||||||
| (473) 2002/5/3 | 88 Internet Explorer 6.0 can adjust picture size within screen Internet Explorer 6.0 can automatically adjust picture size to be displayed in the screen. Big picture, which is far bigger than the monitor, will be automatically adjusted within screen. When the picture will be displayed by the original size, click a icon which have for arrows on four corners. And same icon click displays the picture within screen alternately. It is convenient for bigger size picture. |
||||||||||||||||||||||||||||||||||||||||||||||||||||||||||||||||||||||||||||||||||||||||||||||||||||||||||||
| (472) 2002/5/2 | 87 Setting of characters which colors do not change after click - part
2 This is a HomePage Builder specific way.
|
||||||||||||||||||||||||||||||||||||||||||||||||||||||||||||||||||||||||||||||||||||||||||||||||||||||||||||
| (459) 2002/4/19 | 86 Blurred photo can be improved by sharpness filter
[Amount] slider decides increasing amount. It is set by looking at the improving picture the value will be set between 50 and 150 % from experience. [Radius] slider can decide the improved area around edge or how wide it is. It is recommended between 1 and 3. Acceptable value is 2. When [radius] is set small, only edge can be sharped. When bigger, bigger area pixel can be improved. [Threshold level] is set as the target edge pixel if the difference between around area will exceed the value. To avoid noise into complexion or skin color, value will be set between 2 and 20. Default value is "0" and it makes every pixel sharp within the picture. |
||||||||||||||||||||||||||||||||||||||||||||||||||||||||||||||||||||||||||||||||||||||||||||||||||||||||||||
| (452) 2002/4/12 | 85 Automatic level adjustment of dark photo
-->Shadow and Highlight of PhotoShop CS replaced this procedure. It is much better. |
||||||||||||||||||||||||||||||||||||||||||||||||||||||||||||||||||||||||||||||||||||||||||||||||||||||||||||
| (402) 2002/2/21 | 84 Space in alternative text makes easier to read This is only a problem of Japanese language. Japanese is written continuously without space. Then adding some spaces between propers sentences looks easier to read. Following is a image. Tripknow-howissummarizedfrommyexperience -> Tripknow-howis summarizedfrom myexperience |
||||||||||||||||||||||||||||||||||||||||||||||||||||||||||||||||||||||||||||||||||||||||||||||||||||||||||||
| (396) 2002/2/15 | 83 Shade with black background Background of shade, which is made by Web art designer wizard, is white color but when shade is used on a picture such as night scene then shade part is shown white background and it seems to be unnatural. To avoid this, when making the shade, open html file in which the picture is used and use [edit -> get page background information]. |
||||||||||||||||||||||||||||||||||||||||||||||||||||||||||||||||||||||||||||||||||||||||||||||||||||||||||||
| (385) 2002/2/4 | 82 Edit gif file of photo animation by Web animator Activate Web animator and read gif file that is going to be edited. Editing itself is easily done by adding files or deleting files, but there is one thing to remember. When photos are just inserted, display time is set as zero. To change this display time as [Right click of the photo -> whole change of property -> display time] |
||||||||||||||||||||||||||||||||||||||||||||||||||||||||||||||||||||||||||||||||||||||||||||||||||||||||||||
| (382) 2002/2/1 | 81 Attention of HotMedia because of big file size HotMedia animation is treated as gif, then file size is tend to be bigger. That is a point we should care. When title is made by gradation or shade, that kind of complicated three pictures of 465x40 points became 70 kB. But when it uses simple color usage, it becomes only 15KB. |
||||||||||||||||||||||||||||||||||||||||||||||||||||||||||||||||||||||||||||||||||||||||||||||||||||||||||||
| (381) 2002/1/31 | 80 Do not use many HotMedia simultaneously HotMedia animation picture as cycle display was shown on the right side frame, then title is displayed by HotMedia animation on the above frame. When they were checked by HomePage Builder, there was no problem and both pictures were displayed. But when actually both files are transferred on the web site, both pictures were displayed normally at first, but after moving other pages and going back to top page, both pictures were not displayed. Is it the cause of frame structure and simultaneous display? It is not clear but better not use this kind of usage. In this know-how page, it used to have HotMedia sample picture, but many pictures cause to display delay then I stopped to put them in it and made different pages to link here. |
||||||||||||||||||||||||||||||||||||||||||||||||||||||||||||||||||||||||||||||||||||||||||||||||||||||||||||
| (380) 2002/1/30 | 79 HotMedia can make dynamic title
|
||||||||||||||||||||||||||||||||||||||||||||||||||||||||||||||||||||||||||||||||||||||||||||||||||||||||||||
| (379) 2002/1/29 | 78 With picture frame Open Web art designer of HomePage Builder. Open Web art designer of HomePage Builder.It can be done with wizard as [edit -> Paste from file -> object -> making photo frame] |
||||||||||||||||||||||||||||||||||||||||||||||||||||||||||||||||||||||||||||||||||||||||||||||||||||||||||||
| (378) 2002/1/28 | 77 Scrolling undermost status row by Java script Java script can be inserted by HomePage Builder. Scroll sample is automatically inserted by [raw material -> script Java Script file -> click scroll.js] var msg = "Hello everyone, ......"; Every sentence is inserted into the quotation mark place. |
||||||||||||||||||||||||||||||||||||||||||||||||||||||||||||||||||||||||||||||||||||||||||||||||||||||||||||
| (373) 2002/1/23 | Thanks to Seicho Suzuki to make dreams in Chinese characters Dream of Chinese character has bright image and I wished to have my own characters. Seicho Suzuki drew some characters for my web page. Thanks to it. Every character is unique then I could not narrow down to only one. Now then, I change them once a month. |
||||||||||||||||||||||||||||||||||||||||||||||||||||||||||||||||||||||||||||||||||||||||||||||||||||||||||||
| (372) 2002/1/22 | 75 Addition of html for search engine Sample of this web page First line is for search robot. Second line explains the contents of the web page. This is introduced in the search engine. Third line is for key words. Up to 10 words. Comma is used for partition. Fourth line is title and shown in favorite. It become title also in search engine. <META name="robots" content="index,follow"> <META name="description" content="Welcome to YUME or dreams Gallery. Please enjoy the world photos."> <META name="keywords" content="Travel,DigitalCamera,photos,PC,WebPage,YUME-dreams-Gallery"> <TITLE>Welcome to YUME or dreams Gallery</TITLE> |
||||||||||||||||||||||||||||||||||||||||||||||||||||||||||||||||||||||||||||||||||||||||||||||||||||||||||||
| (371) 2002/1/21 | 74 Paint color with around picture In html, vspace and hspace are used. This sample shows 2 pixels at up-down and 5 pixels at left-right. |
||||||||||||||||||||||||||||||||||||||||||||||||||||||||||||||||||||||||||||||||||||||||||||||||||||||||||||
| (368) 2002/1/18 | 73 Read scrolling video image from existing file Using [Insert -> file -> HotMedia file], read [***.mvr] file. |
||||||||||||||||||||||||||||||||||||||||||||||||||||||||||||||||||||||||||||||||||||||||||||||||||||||||||||
| (367) 2002/1/17 | 72 Making scroll image by HomePage Builder HomePage Builder added [Hot media wizard] in version 6.5. Before that, animation was only made by gif file, then multiple photos are displayed at the same location. But Hot Media can provide different scenes such as photos coming with angle or rotating and so on. To make this file is just to follow a wizard as [Insert -> Hot media applet -> animation] By HotMedia, inserting link or display of alternate text is referred [set up of HotMedia wizard] or [character display when mouse is put on it] |
||||||||||||||||||||||||||||||||||||||||||||||||||||||||||||||||||||||||||||||||||||||||||||||||||||||||||||
| (366) 2002/1/16 | 71 Shaded picture By using HomePage Builder, Web art designer can easily make by reading
picture and push [shade effect] button. By using HomePage Builder, Web art designer can easily make by reading
picture and push [shade effect] button.It can set shade location, color, transparency grade and gradation. Transparency is "0." Gradation is set as "0 - 20" but big number makes shade bigger then "2" or so is possible. |
||||||||||||||||||||||||||||||||||||||||||||||||||||||||||||||||||||||||||||||||||||||||||||||||||||||||||||
| (365) 2002/1/15 | 70 Indent expression sometimes looks easier Indent expression is the following tag. Notice one thing is one space row before the indented row. <BLOCKQUOTE>This sentence is displayed by the indent expression. Indent is used by every paragraph. This sample shows one indent.HomePage Builder can handle it without using HTML, by just pushing the indent icon. Or from menu bar [form -> indent -> indent setting] To release indent, just push the indent release icon or [form -> indent -> indent release]. |
||||||||||||||||||||||||||||||||||||||||||||||||||||||||||||||||||||||||||||||||||||||||||||||||||||||||||||
| (364) 2002/1/14 | 69 Counter setting at asahi-net provider of Japan Insert the following tag. <IMG src="http://cgi.www.ne.jp/cgi-bin/Count.cgi?df=dreams.dat&md=5&dd=A&ft=0&tr=Y&prgb=0;0;255" alt="" width="58" height="26"> df=dreams.dat means variable name which stores counted numbers and can be assigned to any name md=5 digit number of the counter dd=A display style ft=0 without frame tr=Y transparent background and background below can be seen prgb=0;0;255 color code shown as decimal number |
||||||||||||||||||||||||||||||||||||||||||||||||||||||||||||||||||||||||||||||||||||||||||||||||||||||||||||
| (361) 2002/1/11 | 68 Making gif picture without background by HomePage Builder Such as ornamented letters are made by Web art designer when background
is transparent. File -> web save wizard can instruct easily. It saves
as gif file without background. If campus is set bigger than actual image,
then it can save without background not same as jpg file. Such as ornamented letters are made by Web art designer when background
is transparent. File -> web save wizard can instruct easily. It saves
as gif file without background. If campus is set bigger than actual image,
then it can save without background not same as jpg file. |
||||||||||||||||||||||||||||||||||||||||||||||||||||||||||||||||||||||||||||||||||||||||||||||||||||||||||||
| (360) 2002/1/10 | 67 Assign color of link by using "style" description "style" description can designate character color but it can not use simultaneously both absolute size and color. Normal link color is like this without using "style" Grand-place and set character color into red Grand-place <A href="../index.files/Photo_grand_place_night.htm" target="_blank" style="color : red;">Grand-place</A> Another information : Style sheet can assign color of link character and it can do to all letters within the web page. It is more convenient. 2002/05/08 |
||||||||||||||||||||||||||||||||||||||||||||||||||||||||||||||||||||||||||||||||||||||||||||||||||||||||||||
| (359) 2002/1/9 | 66 Two pictures on a same cell
<TD><IMG src="file:///D:/home_page/photo/sss_br_01_grand-place.jpg" border="0" align="right"><IMG src="file:///D:/home_page/parts/ani_new_07.gif" border="0"></TD> <TD><IMG src="file:///D:/home_page/photo/sss_br_01_grand-place.jpg" border="0"><IMG src="file:///D:/home_page/parts/ani_new_11.gif" border="0"></TD> |
||||||||||||||||||||||||||||||||||||||||||||||||||||||||||||||||||||||||||||||||||||||||||||||||||||||||||||
| (316) 2001/11/27 | 65 Automatic sending of impression please by cgi of the provider, asahi-net Provider asahi-net has sending cgi, then impression sending was made by this. This way is not necessary to activate mail software. And on pushing sending button, mail will be sent automatically. <FORM action="http://cgi.www.ne.jp/cgi-bin/formdecode.cgi" method="POST"><IMG src="parts/tb_bld_kansou_o_douzo.gif" width="113" height="18" border="0"><BR> <TEXTAREA rows="5" cols="12" name="impression">Write here freely and push send button.</TEXTAREA><BR> <INPUT type="hidden" name="_to" value="kazuo.ochi@nifty.com"><INPUT type="submit" value="send"> <INPUT type="reset" value="reset"></FORM> |
||||||||||||||||||||||||||||||||||||||||||||||||||||||||||||||||||||||||||||||||||||||||||||||||||||||||||||
| (296) 2001/11/7 | 62 Assign font background color Font color and its background color can be assigned by html source. <FONT style="FONT-SIZE: 30px; background-color : blue;" color="#ffff00"> By this designation, It becomes like this. [LINE-HEIGHT:40] can be abbreviated and it defines both font size and background color assignment. But it may happen to turn into garbage after this assignment in relation to font. This is not an absolute problem. |
||||||||||||||||||||||||||||||||||||||||||||||||||||||||||||||||||||||||||||||||||||||||||||||||||||||||||||
| (295) 2001/11/6 | Font size can be fixed without changing by IE. It is assigned by html source. Font size can be fixed without changing by IE. It is assigned by html source. <FONT style="FONT-SIZE: 14px; LINE-HEIGHT: 18px" color="#0000ff"> Another information : Fixing character size by style sheet can define simultaneously and more convenient 2002/05/08 |
||||||||||||||||||||||||||||||||||||||||||||||||||||||||||||||||||||||||||||||||||||||||||||||||||||||||||||
| (294) 2001/11/5 | 60 Define whole table size It is easier to see if the size of the table is fixed. Especially PC screen has different size such as, 800x600 and 1600x1200. Minimum screen size 800x600 is preferable to avoid side scroll. [table -> property change] then [table -> width of table] chooses pixel. Html source expressed for example 800 pixels as [ <TABLE width="800"> ] |
||||||||||||||||||||||||||||||||||||||||||||||||||||||||||||||||||||||||||||||||||||||||||||||||||||||||||||
| (291) 2001/11/2 | 59 Define column width of the table This page seems to have two-step tab but actually this is expressed by three columns. Width of the tab is decided by the width of the table. [ table -> property change -> table column ] This page is defined by three columns as 15,15,770 and whole width is totally 800 pixels. |
||||||||||||||||||||||||||||||||||||||||||||||||||||||||||||||||||||||||||||||||||||||||||||||||||||||||||||
| (273) 2001/10/15 | 58 Fix location of frame structure Frame should be located without space from upper left but default setting causes clearances at left and upper. Margin item is added into html source. <BODY bgcolor="#cccccc" leftMargin="0" topMargin="0" marginheigt="1" marginwidth="1"> |
||||||||||||||||||||||||||||||||||||||||||||||||||||||||||||||||||||||||||||||||||||||||||||||||||||||||||||
| (272) 2001/10/14 | 57 Frame structure is used By changing provider to Asahinet, web page volume can be taken as big as 25 MB and then I change to the frame structure. One of the reasons not to adopt frame structure is advertisement of a free charge provider. But it is solved by Asahinet of no advertisement. The other reason is pull down menu which can not open with full screen display. Pull down menu was inserted into the biggest page of right down place. That bigger area made it be looked easier. As my web page or catalog page, scrolling is limited to up and down then frame structure is one of choices. |
||||||||||||||||||||||||||||||||||||||||||||||||||||||||||||||||||||||||||||||||||||||||||||||||||||||||||||
| (271) 2001/10/13 | 56 Provider change to Asahi-net in Japan Changed a provider to Asahinet in Japan. Primal reason is size of web pages. Cheapest course of of \450 has 5 MB and I chose the next one that is 25 MB. |
||||||||||||||||||||||||||||||||||||||||||||||||||||||||||||||||||||||||||||||||||||||||||||||||||||||||||||
| (270) 2001/10/12 | 55 Not showing closing line at the frame structure In order not to display closing line, [frameborder="no"] is added in the html source. <FRAMESET cols="133,*" frameborder="no"> <FRAME src="index7.htm"> <FRAMESET rows="94,*" frameborder="no"> <FRAME src="index8.htm"> <FRAME src="index9.htm"> </FRAMESET> |
||||||||||||||||||||||||||||||||||||||||||||||||||||||||||||||||||||||||||||||||||||||||||||||||||||||||||||
| (269) 2001/10/11 | 54 Frame structure and link with full screen Pull down menu can open only at that frame but ordinal link can use whole screen display. By [Insert -> Link -> Target -> Whole screen], link can be done from the frame structure to without frame structure and whole screen display. Html source is added [target="_top"] |
||||||||||||||||||||||||||||||||||||||||||||||||||||||||||||||||||||||||||||||||||||||||||||||||||||||||||||
| (268) 2001/10/10 | 53 Frame structure and pull down menu In Japan, there are some providers of free charge. They display advertisement on a screen. When frame structure is used in this kind of free provider, advertisement comes at each html file. That means if screen is divided into tree, three advertisements are there, that is too much. One more disadvantage is pull down menu. Pull down menu can open only in that html file or only in that window. Pull down menu can not open as whole screen display. Then if frame structure is used, then pull down menu can not be used as whole screen usage. |
||||||||||||||||||||||||||||||||||||||||||||||||||||||||||||||||||||||||||||||||||||||||||||||||||||||||||||
| (258) 2001/9/30 | 52 Flame structure I thought frame structure seems complicated and the provider that I use does not guarantee the frame structure then I stopped to use it. Bet photos of Gallery introduction increased and when scrolling to see photos, upper and left banners can not be seen. Then I tried the frame structure. To make frame structure by HomePage Builder is easy. By following as [frame -> new frame making from template] category is assigned. My sample is three frameworks, left, upper right and lower right. It is assumed as three independent web pages. Three independent html files should be made. Root html file is to define the width, size and file name etc. |
||||||||||||||||||||||||||||||||||||||||||||||||||||||||||||||||||||||||||||||||||||||||||||||||||||||||||||
| (230) 2001/9/3 | 51 Difference between Internet Explorer and Netscape Navigator When I saw my web page by Netscape, I was surprised to see the difference that was over my expectation. here is a scrolling expression at the top page. I knew that there is no such expression as in Netscape but when I saw it that characters, which were input for scroll characters, were displayed just in line of characters and it was a little bit embarrassing. The other thing is letters with background in a table. To explain contents there are letters up or down of photos and one of example is yellow letters with blue background. In Netscape, blue background was not displayed then yellow letters were shown on white background and it was not easy to read the characters. -> Today I gave up to express both IE and Netscape. IE was my choice. |
||||||||||||||||||||||||||||||||||||||||||||||||||||||||||||||||||||||||||||||||||||||||||||||||||||||||||||
| (199) 2001/8/3 | 50 Change file names of photos by one command Digital camera decides file names of photos. And sometimes we would like to change simultaneously. There are some software to do this and they are convenient. |
||||||||||||||||||||||||||||||||||||||||||||||||||||||||||||||||||||||||||||||||||||||||||||||||||||||||||||
| (198) 2001/8/2 | 49 Scrolling characters -5 I wondered why vertical size of scrolling character can not be changed. I found that it depends upon character size when it is seen by Internet Explorer. Character height is automatically set as the size of first setting. If IE character size is big when first set, then height becomes high. And even character size is changed but height is kept. When characters were set bigger originally, it is easy to make them small because characters only became small. But on the contrary, when first setting was defined by smaller and they are tied to be bigger. Because scroll height is not changed and then characters are shown lacked. |
||||||||||||||||||||||||||||||||||||||||||||||||||||||||||||||||||||||||||||||||||||||||||||||||||||||||||||
| (193) 2001/7/28 | 48 Graph is made by Excel and pasted on HomePage Builder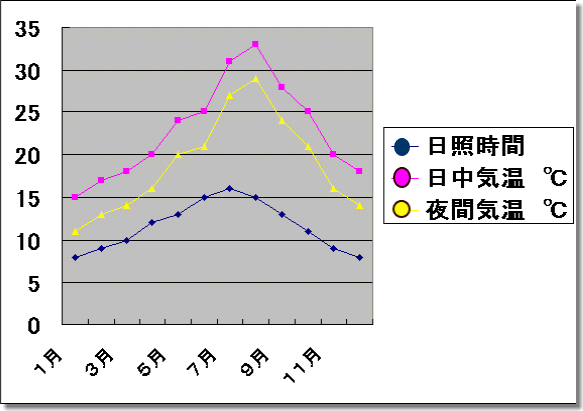 It is easy to make and paste a graph. When making a graph by Excel and
copy and past it to HomePage Builder, it creates gif file and is inserted
in html. It is easy to make and paste a graph. When making a graph by Excel and
copy and past it to HomePage Builder, it creates gif file and is inserted
in html.Once pssting it, it can be enlarged or shrank because it is a gif file. But on the contrary, it can not be changed character change or change graph itself because it is not a graph but a picture. Graph itself change is done by Excel. |
||||||||||||||||||||||||||||||||||||||||||||||||||||||||||||||||||||||||||||||||||||||||||||||||||||||||||||
| (171) 2001/7/6 | 46 cellspacing=size of ruled line cellspacing can define the size of ruled line of the cell. Not inserting this, default description is set to "2". Following sample shows 3 dot ruled line within the cell. <TABLE cellspacing="3" cellpadding="2" border="3" bordercolor="blue" width="622" background="parts/back_blue_light.gif"> |
||||||||||||||||||||||||||||||||||||||||||||||||||||||||||||||||||||||||||||||||||||||||||||||||||||||||||||
| (170) 2001/7/5 | 45 cellpadding=space size celpadding can define space size within the cell. Not inserting this, default description is set to "1". Following sample handles 2 dot space within the cell. <TABLE cellspacing="0" cellpadding="2" border="3" bordercolor="blue" width="622" background="parts/back_blue_light.gif"> |
||||||||||||||||||||||||||||||||||||||||||||||||||||||||||||||||||||||||||||||||||||||||||||||||||||||||||||
| (169) 2001/7/4 | 44 Font color does not change even after link insertion Font color expression is put just after link address then link color will not change even after pushing link. <FONT color="#cc0000" size="+2"><A href="#segesta" target="_self">Belgium</FONT></A> Default HomePage Builder makes upper kind of html. It will be accomplished just to change order. <A href="#segesta" target="_self"><FONT color="#cc0000" size="+2">Belgium</FONT></A> Another information : Style sheet can fix all the color within the web page 2002/05/08 |
||||||||||||||||||||||||||||||||||||||||||||||||||||||||||||||||||||||||||||||||||||||||||||||||||||||||||||
| (149) 2001/6/15 | 43 Head symbol of itemized style Style sheet can provide the top symbol |
||||||||||||||||||||||||||||||||||||||||||||||||||||||||||||||||||||||||||||||||||||||||||||||||||||||||||||
| (148) 2001/6/14 | 42 Upload by HomePage Builder I have used FTP tool for file transfer but HomePage builder can do it too. |
||||||||||||||||||||||||||||||||||||||||||||||||||||||||||||||||||||||||||||||||||||||||||||||||||||||||||||
| (147) 2001/6/13 | 41 Use special character which are banned Characters which are used in HTML language are not allowed to use such as "<" or ">" Editor such as HomePage Builder, may change automatically. |
||||||||||||||||||||||||||||||||||||||||||||||||||||||||||||||||||||||||||||||||||||||||||||||||||||||||||||
| (146) 2001/6/12 | 40 Scrolling characters -4 Scrolling characters' vertical location can not be changed. I tried to lower vertically but could not. [align="bottom"] can locate lower vertically for a picture but not for characters. Therefore character size is set to expected size from the beginning avoid to change the size later. Character size is defined by height and size as background height and character size. |
||||||||||||||||||||||||||||||||||||||||||||||||||||||||||||||||||||||||||||||||||||||||||||||||||||||||||||
| (145) 2001/6/11 | 39 Scrolling characters -3 This web is made by both Japanese and English. Expression of space between characters are different from Japanese and English html. English version can not insert consecutive spaces in one position but Japanese double byte version can do it for any space characters. |
||||||||||||||||||||||||||||||||||||||||||||||||||||||||||||||||||||||||||||||||||||||||||||||||||||||||||||
| (140) 2001/6/6 | 38 Go back to top page even from middle pages Search site "goo" introduced my web of YUME or dreams Gallery unintentionally. This unexpected quotation and its ranking of third surprised me. This ranking is made by search robot at this site. Even with the unexpected quotation and in order to go back to top page, then installed a button to return back to top page. |
||||||||||||||||||||||||||||||||||||||||||||||||||||||||||||||||||||||||||||||||||||||||||||||||||||||||||||
| (139) 2001/6/5 | 37 Scrolling characters - 2 Adding background color, width, height and scroll speed can be assigned. <MARQUEE bgcolor="#0000CC" vspace="8" width="495" height="16" scrollamount="3"> bgcolor assigns background color and vspace is space of upper and lower, then width and height are fixed also, scrollamount defines dot number on moving one time. |
||||||||||||||||||||||||||||||||||||||||||||||||||||||||||||||||||||||||||||||||||||||||||||||||||||||||||||
| (138) 2001/6/4 | 36 Give color to lines - part.2
<TABLE border="1" bordercolor="red" width="622" background="parts/back_blue_light.gif"> |
||||||||||||||||||||||||||||||||||||||||||||||||||||||||||||||||||||||||||||||||||||||||||||||||||||||||||||
| (134) 2001/5/31 | 35 Add color to ruled lines of the table
<TABLE style="background:blue" border="1" align="right"> <TBODY> <TR style="background:white"> <TD>At first,<BR>the table</TD><TD>is colored<BR>blue.</TD></TR> <TR style="background:white"> <TD>and then<BR>each cell<BR>is colored</TD><TD>white.<BR>It is like<BR>a trick.</TD></TR> </TBODY></TABLE> To say the truth, at first the table is colored blue and then each cell is colored white. |
||||||||||||||||||||||||||||||||||||||||||||||||||||||||||||||||||||||||||||||||||||||||||||||||||||||||||||
| (133) 2001/5/30 | 34 Display page moves by pull down menu Pull down menu will be added in the HTML source. <FORM>Choose Gallery and push "Go!" button.<SELECT name="CNT"> <OPTION value="index.files/Photo_grand_place_night.htm">Beautiful square Grand-Place of Belgium</OPTION> <OPTION value="index.files/Photo_R_burg.htm">Gem box of Medieval Rhotenburg</OPTION> <OPTION value="index.files/Photo_taipei.htm">Taipei of Taiwan</OPTION> </SELECT><INPUT type="button" value="Go!" onclick="JAVASCRIPT:location=CNT.options[CNT.selectedIndex].value"></FORM> |
||||||||||||||||||||||||||||||||||||||||||||||||||||||||||||||||||||||||||||||||||||||||||||||||||||||||||||
| (132) 2001/5/29 | 33 Send "impression please" by mail. Usable even for not responding
providers of the cgi Send a content of impression by text mail. Mail software such as Outlook will be activated automatically. Sending button will be pushed by the person who is going to send. That is a little bothersome. But this can activate even the provider does not respond the cgi. Form text will be inserted by [insert -> others -> html tag (M)]. Following sample is the html source. <FORM action="mailto:kazuo.ochi@nifty.com" method="post" enctype="text/plain"><IMG src="parts/tb_bld_kansou_o_douzo.gif" width="113" height="18" border="0"><BR> <TEXTAREA rows="5" cols="12" name="impression">Write freely in here and push the send button.</TEXTAREA><BR> <INPUT type="submit" value="送信"></FORM>
|
||||||||||||||||||||||||||||||||||||||||||||||||||||||||||||||||||||||||||||||||||||||||||||||||||||||||||||
| (124) 2001/5/21 | 32 Mirroring upload of FFFTP Server files are synchronized with PC files. |
||||||||||||||||||||||||||||||||||||||||||||||||||||||||||||||||||||||||||||||||||||||||||||||||||||||||||||
| (114) 2001/5/11 | 31 Scrolling characters Scrolling characters is the only Internet Explorer's expression. It must be edited by HTML source because it can not be edited by the page editing. <BR><MARQUEE bgcolor="#0000CC"><B><FONT color="#FFFF00">This is a sample.</FONT></B></MARQUEE><BR> bgcolor is the color of background and FONT color fix. <B> bold character is better because normal letters are a little bit difficult to read when scrolling. Netscape provides blink of characters but this expression is not applied to Internet Explorer either. |
||||||||||||||||||||||||||||||||||||||||||||||||||||||||||||||||||||||||||||||||||||||||||||||||||||||||||||
| (94) 2001/4/21 | 30 Color chart Various colors were used in my web then those colors were summarized in a table. |
||||||||||||||||||||||||||||||||||||||||||||||||||||||||||||||||||||||||||||||||||||||||||||||||||||||||||||
| (90) 2001/4/17 | 29 Send form content Continuing after the upper "input of impression," send button will be made by [insert -> input parts -> push button -> send button] In order to send it actually, the sever must have responding cgi. After inserting send button, [right click -> property change] Responding URL will be inserted into form handler action. Encode category is "text/plain." Name is set anything. Target window is chosen from new or same. |
||||||||||||||||||||||||||||||||||||||||||||||||||||||||||||||||||||||||||||||||||||||||||||||||||||||||||||
| (89) 2001/4/16 | 28 Impression input by form expression "Impression please" input was made by form expression. First thing is to make a place to input in connection with the next content "send form." Form is inserted by [insert -> input parts -> plural row text input]. Text of "Impression please" is edited later by html source. After inputting "form", html source is surrounded by "FORM" then just after the first sentence, text characters are inserted. Character bold or color can be changed later. <FORM><B><FONT color="#000099">Impression Please</FONT></B><BR> <TEXTAREA rows="4" cols="12" name="Impression">Send everything you feel </TEXTAREA><BR> <INPUT type="submit" name="Send of impression" value="send"></FORM> |
||||||||||||||||||||||||||||||||||||||||||||||||||||||||||||||||||||||||||||||||||||||||||||||||||||||||||||
| (82) 2001/4/9 | 27 Only outer frame of the table changes color and thickness
"TABLE" defines one big table's property, "border=4" means line thickness 4-dot and [bordercolor="#ff8000"] defines orange color. <TABLE cellspacing="0" cellpadding="0" border="4" rules="none" bordercolor="#ff8000" bgcolor="#ffffcc"> |
||||||||||||||||||||||||||||||||||||||||||||||||||||||||||||||||||||||||||||||||||||||||||||||||||||||||||||
| (81) 2001/4/8 | 26 On-chip display which pops up explanation on mouse |
||||||||||||||||||||||||||||||||||||||||||||||||||||||||||||||||||||||||||||||||||||||||||||||||||||||||||||
| (77) 2001/4/4 | 25 Hex -> Decimal conversion table for color table Color expression is used with "red, green and blue" three elementary colors of hexadecimal. Yellow is "ffff66" Usually it is expressed as hexadecimal but when it is chosen as "other colors," three elementary colors must be input by decimal. This is a conversion table. Same yellow color is "255,255,105" by decimal expression. |
||||||||||||||||||||||||||||||||||||||||||||||||||||||||||||||||||||||||||||||||||||||||||||||||||||||||||||
| (69) 2001/3/27 | 24 cgi of bulletin board is written by text script I knew this time that the cgi is written by text. All cgi text was set as default without password. |
||||||||||||||||||||||||||||||||||||||||||||||||||||||||||||||||||||||||||||||||||||||||||||||||||||||||||||
| (65) 2001/3/23 | 23 Rebirth by using table style Structure was changed drastically as Version.2. Objectives are
|
||||||||||||||||||||||||||||||||||||||||||||||||||||||||||||||||||||||||||||||||||||||||||||||||||||||||||||
| (58) 2001/3/16 | 22 Distinction between Japanese and other countries My web page was made in Japanese only at first and then I tried to make English page for Rhotenburg. To make English page, I read 400 web pages of Rhotenburg and found the difference between Japanese and other countries. That relates with picture and sentence. Japanese site like drawings or pictures but for example English written pages are character pages. That probably depends upon cultural background. |
||||||||||||||||||||||||||||||||||||||||||||||||||||||||||||||||||||||||||||||||||||||||||||||||||||||||||||
| (56) 2001/3/14 | 20 Link is not for compensating my own lack of information My web page of Rhotenburg was not sufficient of information with only photos. Then I thought link could compensate that lack part. I asked an author of Rhotenburg. The author mailed me that link itself is agreeable but usage for compensation was rejected. This is understandable. Contents should be completed within the web page. Link should be just a reference. |
||||||||||||||||||||||||||||||||||||||||||||||||||||||||||||||||||||||||||||||||||||||||||||||||||||||||||||
| (55) 2001/3/13 | 19 Link target should be set to top page When introducing other web page, agreement of the web page is necessary. My first link web was about dog Welsh Corgi. I asked the permission of the web of Corgi link. I received a reply from the web and it said that Agreed but link to top page. At first I linked directly the web that I wanted to introduce. It is not fair to utilize the page to be convenient only to myself. This is one of important manner. |
||||||||||||||||||||||||||||||||||||||||||||||||||||||||||||||||||||||||||||||||||||||||||||||||||||||||||||
| (54) 2001/3/12 | 18 Rollover effect on a picture It can be get by following [Insert page parts -> Insert rollover effect] Contrast between two pictures extremely can attract eyes. Character picture is made by [make background transparent by gif], it can be get by gif picture. |
||||||||||||||||||||||||||||||||||||||||||||||||||||||||||||||||||||||||||||||||||||||||||||||||||||||||||||
| (53) 2001/3/11 | 17 Refer to other web pages I recommend to start to make own web page. When I started to make it, I did not have any knowledge about web page. I only know one thin that web page file is written by text. Even with this knowledge, every body can start it because we have a very good software of HomePage Builder. My all web page is written by this HomePage Builder. This is easy to handle for a new comer. Let's do it. Happy if we have many companies. One more thing I did is to refer other web pages. Because I started from Zero base and I did not have some experts around me, then I have been watching interesting pages to save an see by HomePage Builder for one week from starting. And it could give me many knowledge as ... how to use the way of table usage or, if we use banner as base of link, characters color will not change after click and so on. |
||||||||||||||||||||||||||||||||||||||||||||||||||||||||||||||||||||||||||||||||||||||||||||||||||||||||||||
| (52) 2001/3/10 | 16 Setting of characters which colors do not change after click By visiting once, link characters' color changes. As a default color changes into russet just by one click. Hope is just one color from start to end. I tried some ways and found one thing. Following instruction makes just one color even after the click that is [characters are area-assigned -> right click -> set style -> set style to only current tag -> edit (4) -> color and background -> set with foreground color] Another information : same as "assign link character color using style sheet" 2002/5/9 |
||||||||||||||||||||||||||||||||||||||||||||||||||||||||||||||||||||||||||||||||||||||||||||||||||||||||||||
| (51) 2001/3/9 | 15 Picture animation is made by gif file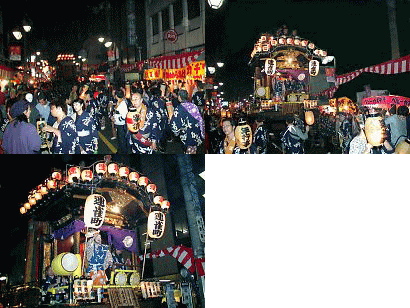 An animation of our town's famous Kawagoe-Matsuri Festival is made of gif
file. This photo animation is easily made by HomePage Builder too. First,
some photos are prepared. It is better that photos are arranged to almost
same size. Then following wizard can easily made the animation as [Tool
-> Web animator -> animation wizard -> Making animation by using
multiple image file] An animation of our town's famous Kawagoe-Matsuri Festival is made of gif
file. This photo animation is easily made by HomePage Builder too. First,
some photos are prepared. It is better that photos are arranged to almost
same size. Then following wizard can easily made the animation as [Tool
-> Web animator -> animation wizard -> Making animation by using
multiple image file]It is suitable that repetition number as [infinity], display time as [800 mSec]. |
||||||||||||||||||||||||||||||||||||||||||||||||||||||||||||||||||||||||||||||||||||||||||||||||||||||||||||
| (48) 2001/3/6 | 13 What is the cause of display speed? Lovely dog Harry's page was very slow to be displayed. Each photo's jpg file size is not so different from others. And number of photos of Komyozenji-temple of 24 is much more than Harry's 20. Anyway when photo number is reduced from 20 to 16, then display speed went up to other average page's speed. Reduced number of picture is one of ways to go up display speed. |
||||||||||||||||||||||||||||||||||||||||||||||||||||||||||||||||||||||||||||||||||||||||||||||||||||||||||||
| (46) 2001/3/4 |
12 Letter animation can be made by gif file Animation of gif file can be made easily. Especially file of letters is
easy. Thai is because HomePage Builder is excellent software. Animation of gif file can be made easily. Especially file of letters is
easy. Thai is because HomePage Builder is excellent software.Tool -> Web animator -> file -> animation wizard -> letter animation -> assign background picture (or not assign) -> input letters which are displayed -> choose variation of effect |
||||||||||||||||||||||||||||||||||||||||||||||||||||||||||||||||||||||||||||||||||||||||||||||||||||||||||||
| (45) 2001/3/3 | 11 Background can be transparent by gif Picture with transparent background can be made by gif file. Tool -> Web art designer -> file -> New campus After making the file, it is saved as gif. |
||||||||||||||||||||||||||||||||||||||||||||||||||||||||||||||||||||||||||||||||||||||||||||||||||||||||||||
| (44) 2001/3/2 | 10 File size of gif and jpg jpg is a compressed file then file size is smaller than gif file. For example
this photo is 16kb by jpg, but gif is 55kb and is 3.4 times big than the jpg file. But if number of colors is relatively
little, then file size is same or sometimes small. At the beginning of
this web, this dog was used and file size of them is same as 4.5kb in gif and jpg. jpg is a compressed file then file size is smaller than gif file. For example
this photo is 16kb by jpg, but gif is 55kb and is 3.4 times big than the jpg file. But if number of colors is relatively
little, then file size is same or sometimes small. At the beginning of
this web, this dog was used and file size of them is same as 4.5kb in gif and jpg. |
||||||||||||||||||||||||||||||||||||||||||||||||||||||||||||||||||||||||||||||||||||||||||||||||||||||||||||
| (21) 2001/2/6 | 9 Left adjust display in center position? Left adjust in center is a little bit strange but this is one of troublesome glamor of html. My first web page was on a freeweb server and it is like a private broadcast then an advertisement to manage the server pops up in center of the web. Left adjustment display does not balance because advertisement is in center. And then center adjustment is adopted as a basic style but uniform style of center adjustment cause a problem when long and short sentences will be adjusted in center, then beginning of sentence becomes irregular. This is a role of table. Location of table is set in center and display in each cell is arranged left side. When table lines are not displayed, whole display style is set in center and sentence begins from left side. This is left adjustment in center. |
||||||||||||||||||||||||||||||||||||||||||||||||||||||||||||||||||||||||||||||||||||||||||||||||||||||||||||
| (20) 2001/2/5 | 8 Photos thumbnail display can get by table structure Top page is a place to be seen first then if photos are there, that page will have a bigger chance to be seen. That is why I put some photos at the top page. My page, for example of Rhotenburg, shows that photos can be arranged by thumbnail style of table. At Rhotenburg, one table uses 4 rows and 18 columns. Title row was combined four cells. By changing cell height, it can vary according to character size. When rows and columns will be inserted space cell, it can create gap between photos. Our town Kawagoe sample shows four columns table was inserted space and made it 7 rows and 10 columns. |
||||||||||||||||||||||||||||||||||||||||||||||||||||||||||||||||||||||||||||||||||||||||||||||||||||||||||||
| (19) 2001/2/4 | 7 Decoration bar is made by a table expression Table seems to have a very important role in html. Brown bar of top page, up and down of "today's phrase," actually, this is a expression of table function. This table seems to be three rows and one column but actually, three rows and three columns. Brown bar seems to be a cell but it is a result of combination from three cells and background of the cell is changed to brown and furthermore thickness of the cell is thinned. Under brown bar is same treatment and it seems to be just a line. Internet browser can change character size and even at that time, table can fix cell location and size. We can use table like this conveniently. |
||||||||||||||||||||||||||||||||||||||||||||||||||||||||||||||||||||||||||||||||||||||||||||||||||||||||||||
| (18) 2001/2/3 | 6 Usage as tab When I started to make a web page, I sometimes look at another pages in view of interesting how other authors try to express their own way. One of them is how to practically use table expression. At first, I tried to find tab function as used in word processor. I could not find, instead of the tab function, everybody uses table function. When lines are erased from a table, it brings same effect as tab. And even if character size is changed to become bigger, location is not changed because originally it uses table. Visual look is not a table but table usage has wide and variety. |
||||||||||||||||||||||||||||||||||||||||||||||||||||||||||||||||||||||||||||||||||||||||||||||||||||||||||||
| (10) 2001/1/26 | 5 Making Web Pages --- Three major tools 1.IBM HomePage Builder, Japanese version 2.FTP tool, FFFTP in Japanese 3.Tool to shrink picture size All of them are Japanese, but these are essential. |
||||||||||||||||||||||||||||||||||||||||||||||||||||||||||||||||||||||||||||||||||||||||||||||||||||||||||||
| (9) 2001/1/25 | 4 Failure of counter installation Because I do not know how to make html file, then following to instruction, small file of "index.htm" could be made automatically, and saved it. Using screen copy, then the number of the counter was just a image of that time's gif file. Every time it shows just same number of "1." Some friends called me and said he/she was No. 1. Then there were many No.1s. That is reasonable because nothing changes. |
||||||||||||||||||||||||||||||||||||||||||||||||||||||||||||||||||||||||||||||||||||||||||||||||||||||||||||
| (8) 2001/1/24 | 3 Space in filee name Netscape shows "Not found" when the file name has space. When the file has space, to see it in Netscape can be possible to change URL of the link to substitute space as "%20". Photo R_burg.htm - Photo%20R_burg.htm IE may change this change automatically. |
||||||||||||||||||||||||||||||||||||||||||||||||||||||||||||||||||||||||||||||||||||||||||||||||||||||||||||
| (7) 2001/1/23 | 2 Don'ts !! First challenge to make a web page and first failure. In file name, Japanese can not be used. Making web page could be done even from this kind of beginner's level. Things to be learned after this.
|
||||||||||||||||||||||||||||||||||||||||||||||||||||||||||||||||||||||||||||||||||||||||||||||||||||||||||||
| (6) 2001/1/22 | 1 File name Actually, there was a false at the beginning. It was a file name of Japanese and long name. It was not recognized. It was necessity. But this kind of matter is beyond armature. I thought it should be same as Windows. It took long time to realize the file name. |
||||||||||||||||||||||||||||||||||||||||||||||||||||||||||||||||||||||||||||||||||||||||||||||||||||||||||||
| (3) 2001/1/19 | About the title of YUME or dreams First title was "Welcome to the photo studio of Rhotenburg and Welsh Corgi." Because there were only two Galleries because it had only two galleries. A gallery of our town Kawagoe was added in it and the the title changed to the current one in order to generalize the contents. I wrote letters of dream in new year's greeting cards. Do you have a dream? If you have a dream, you can get it. I like the sound of the dream both in English and Japanese. Then I chose this title in my Web page. |
||||||||||||||||||||||||||||||||||||||||||||||||||||||||||||||||||||||||||||||||||||||||||||||||||||||||||||
| (1) 2001/1/17 | rigger of starting to make my Web page IBM's HomePage Builder helped me to make a Web page at first. First impression was that it could be finished quite faster than I expected. I thought at that time I should have started it because it was so easy to make it. I have been thinking to make it for long time but I could not imagine the contents. Trigger was a Web page of a friend of mine. His page displayed only photos. This pushed me to start to make it. Thank you my friend. |
||||||||||||||||||||||||||||||||||||||||||||||||||||||||||||||||||||||||||||||||||||||||||||||||||||||||||||
